The Simple Knit Sweater is one of my favorite patterns from last winter so I’m bringing it back in a new fall feature!
You might remember this pattern from when I first posted it here on the blog earlier this year. This post holds the same pattern, showing you a bit of a different way to style it!

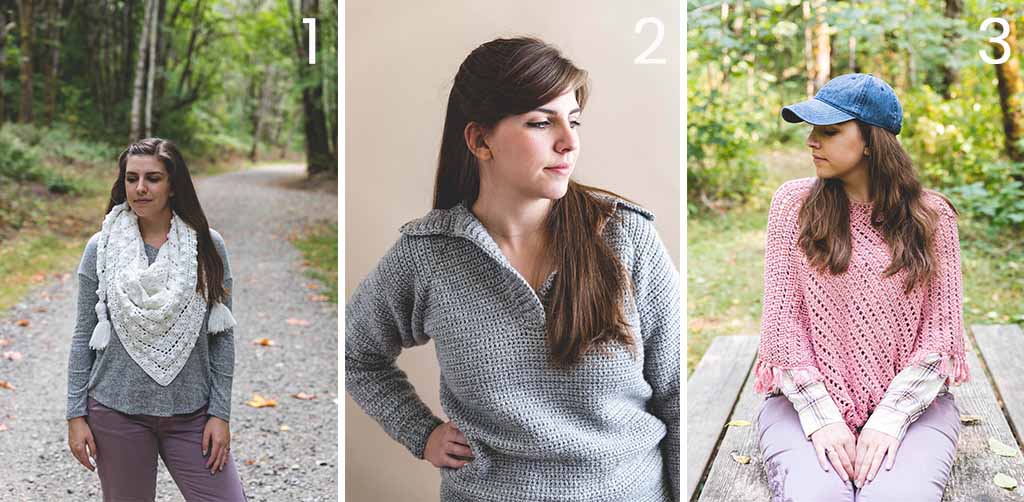
LAYERING PATTERNS I LOVE (& you should too)

1. Crochet Le Nuage Wrap / 2. Crochet Rainier Sweater / 3. Crochet Ava Poncho
The Yarn
I chose to use Lion Brand’s super popular Wool Ease Thick & Quick for this pattern. It’s great to use bulky weight yarn when we are just learning to knit. The stitches are bigger and it’s a little easier to see what you’re doing. I think it’s easier to hold the yarn and get really familiar with knitting and purling with thicker yarn too.
Lion Brand created a kit for this pattern in some stunning color options! I used the Fisherman colorway for this pattern, but I also love those Fig and Taupe colorways too.
Grab your kit by clicking here – it comes with a printed copy of the pattern too!

PATTERN
- Get the ad-free, large print, printable PDF pattern from Etsy HERE.
- Grab the Ultimate Pattern Bundle that includes 150+ patterns just like this one on sale for $20 today HERE.
- PIN this pattern to your Pinterest boards for later HERE.
- Add this pattern to your Ravelry queue HERE.
Materials:
–Lion Brand Yarn Wool Ease Thick & Quick in Fisherman (XS-S: 5 skeins, M-L: 6 skeins, XL-2XL: 7 skeins, 3XL: 8 skeins)
Grab the kit with everything you need from Lion Brand HERE!
–Size 17/12mm knitting needles
Gauge:
8 sts in garter stitch = 4 in.
16 rows = 4 in.
Measurements:
Bust: 30″ (XS) 34″ (S) 38″ (M) 42 ” (L) 46″ (XL) 50″ (XXL) 54″ (XXXL)
Width across back: 17″ (XS) 18″ (S) 19″ (M) 20″ (L) 21″ (XL) 22″ (XXL) 23″ (XXXL)
Length: 21″ (XS) 22″ (S) 23″ (M) 23.5″ (L) 24″ (XL) 24.5″ (XXL) 24.5″ (XXXL)
Armhole: 6″ (XS) 6.5″ (S) 6.5″ (M) 7″ (L) 7″ (XL) 7.5″ (XXL) 8″ (XXXL)
Sleeve Length: 16.5″ (XS) 17″ (S) 17″ (M) 17.5″ (L) 17.5″ (XL) 18″ (XXL) 18″ (XXXL)
Abbreviations:
co – cast on
k – knit
k2tog – knit 2 stitches together
p – purl
rep – repeat
rs – right side
st(s) – stitch(es)
ws – wrong side
Pattern Notes:
Difficulty level: 1/Beginner
-For reference, model is 5’5” tall, and wearing the Simple Knit Sweater in a size Medium. Fit is oversized, for a more fitted sweater size down.
-Sizing listed in the pattern will be in X-Small with Small, Medium, Large, Xl, 2X, and 3X listed in parenthesis such as 36 “(41, 46, 51, 56, 61, 66)” whereas co 36 for size XS, 41 for size S, 46 for size M, 51 for size L, 56 for size XL, 61 for size 2X and 66 for size 3X. When only one number is given, it applies to all sizes. To follow pattern more easily, circle/highlight all numbers pertaining to your size before beginning.
-This pullover sweater is worked in 5 pieces, the front and back panels, 2 sleeve panels then seamed together. The neckline ribbing is stitched on last by picking up stitches.
-All sizing is a bit oversized and based on the CYC sizing regulations.

Simple Knit Sweater
Back Panel
Co 30 (38, 46, 54, 62, 70, 78) sts
RIbbing
Rows 1 – 6: K1, P1, rep across
Body
Rows 7 – 58 (62, 66, 70, 74, 78, 82): K all sts (garter st)
Bind off all sts
Front Panel
Co 30 (38, 46, 54, 62, 70, 78) sts
Ribbing
Rows 1 – 6: K1, P1, rep across
Body
Rows 7 – 52 (56, 60, 64, 68, 72, 76): K all sts (gater st)
Shoulder shaping
Row 1: K 9 (12, 15, 18, 21, 24, 27) sts, bind off 12 (14, 16, 18, 20, 22, 24) sts for the neckline, K remaining 9 (12, 15, 18, 21, 24, 27) sts for the other shoulder
Row 2: K all sts on one shoulder side (first 9, 12, 15, 18, 21, 24, 27 sts), leave remaining sts on the needle unworked (finish one shoulder at a time)
Row 3: K2tog, K all remaining sts on that shoulder side
Row 4: K all sts
Row 5: Repeat Row 3
Bind off all sts on that shoulder side
Join yarn to other shoulder side (close to neckline) and K all sts
Row 2: K all sts
Row 3: K2tog, K remaining sts
Row 4: K all sts
Row 5: Repeat Row 3
Bind off all sts
Weave ends.
Sleeves
*make 2
Co 26 (28, 30, 32, 36, 38, 40) sts
Rows 1 – 32: K all sts (garter st)
Row 33: K 3, K2tog, rep across
Rows 34 – 54 (56, 56, 58, 58, 60, 60): K all sts
Ribbing
Rows 1-6: K1, P1, rep across
Bind off all sts
Seaming
Shoulder seams: Sew front shoulder shaping with a mattress stitch to back panel with WS facing you.
Sleeve: Open your sweater with seamed shoulders to lie flat with RS facing up. Lie sleeves flat with RS facing up. Count to center of sleeve Co sts, match up with shoulder seam and place a stitch marker to hold centered in place. Sew sleeve’s Co edge to sweater bodice with a whip stitch. Repeat on other side.
Side seams: Fold sweater to match the side seams and sleeve underarm seam. Sew with an invisible vertical seam beginning with sleeve ribbing, along underarm, and continuing along the front and back panel body and finish with bodice ribbing. Repeat on other side
Weave all ends.
Neckline
Pick up stitches all along the neckline of the sweater (working into the shoulder seams themselves and all cast off stitches).
# of neckline stitches will vary depending on your size, just make sure you’ve picked up an even number of stitches.
Rows 1-2: K 1, P 1, rep around
Bind off all sts
Weave all ends.

Earning a Living with my Handmade Home
If you love crocheting and knitting, you should think about starting a blog! I’ll help you get started to turn your hobby into a money-making career with my free “Start a Blog” guide.
Or you can check out my latest income report to see how this blog earned over $10,000 last month!
love your patterns and looking forward to the KAL