A sweater worth gushing over – my Knit Gingham Sweater – is a free knitting pattern here on the blog!
Read through my inspiration, design process, and lots of info on the perfect yarn I chose, or scroll on down for the free pattern.
The Inspiration + Design
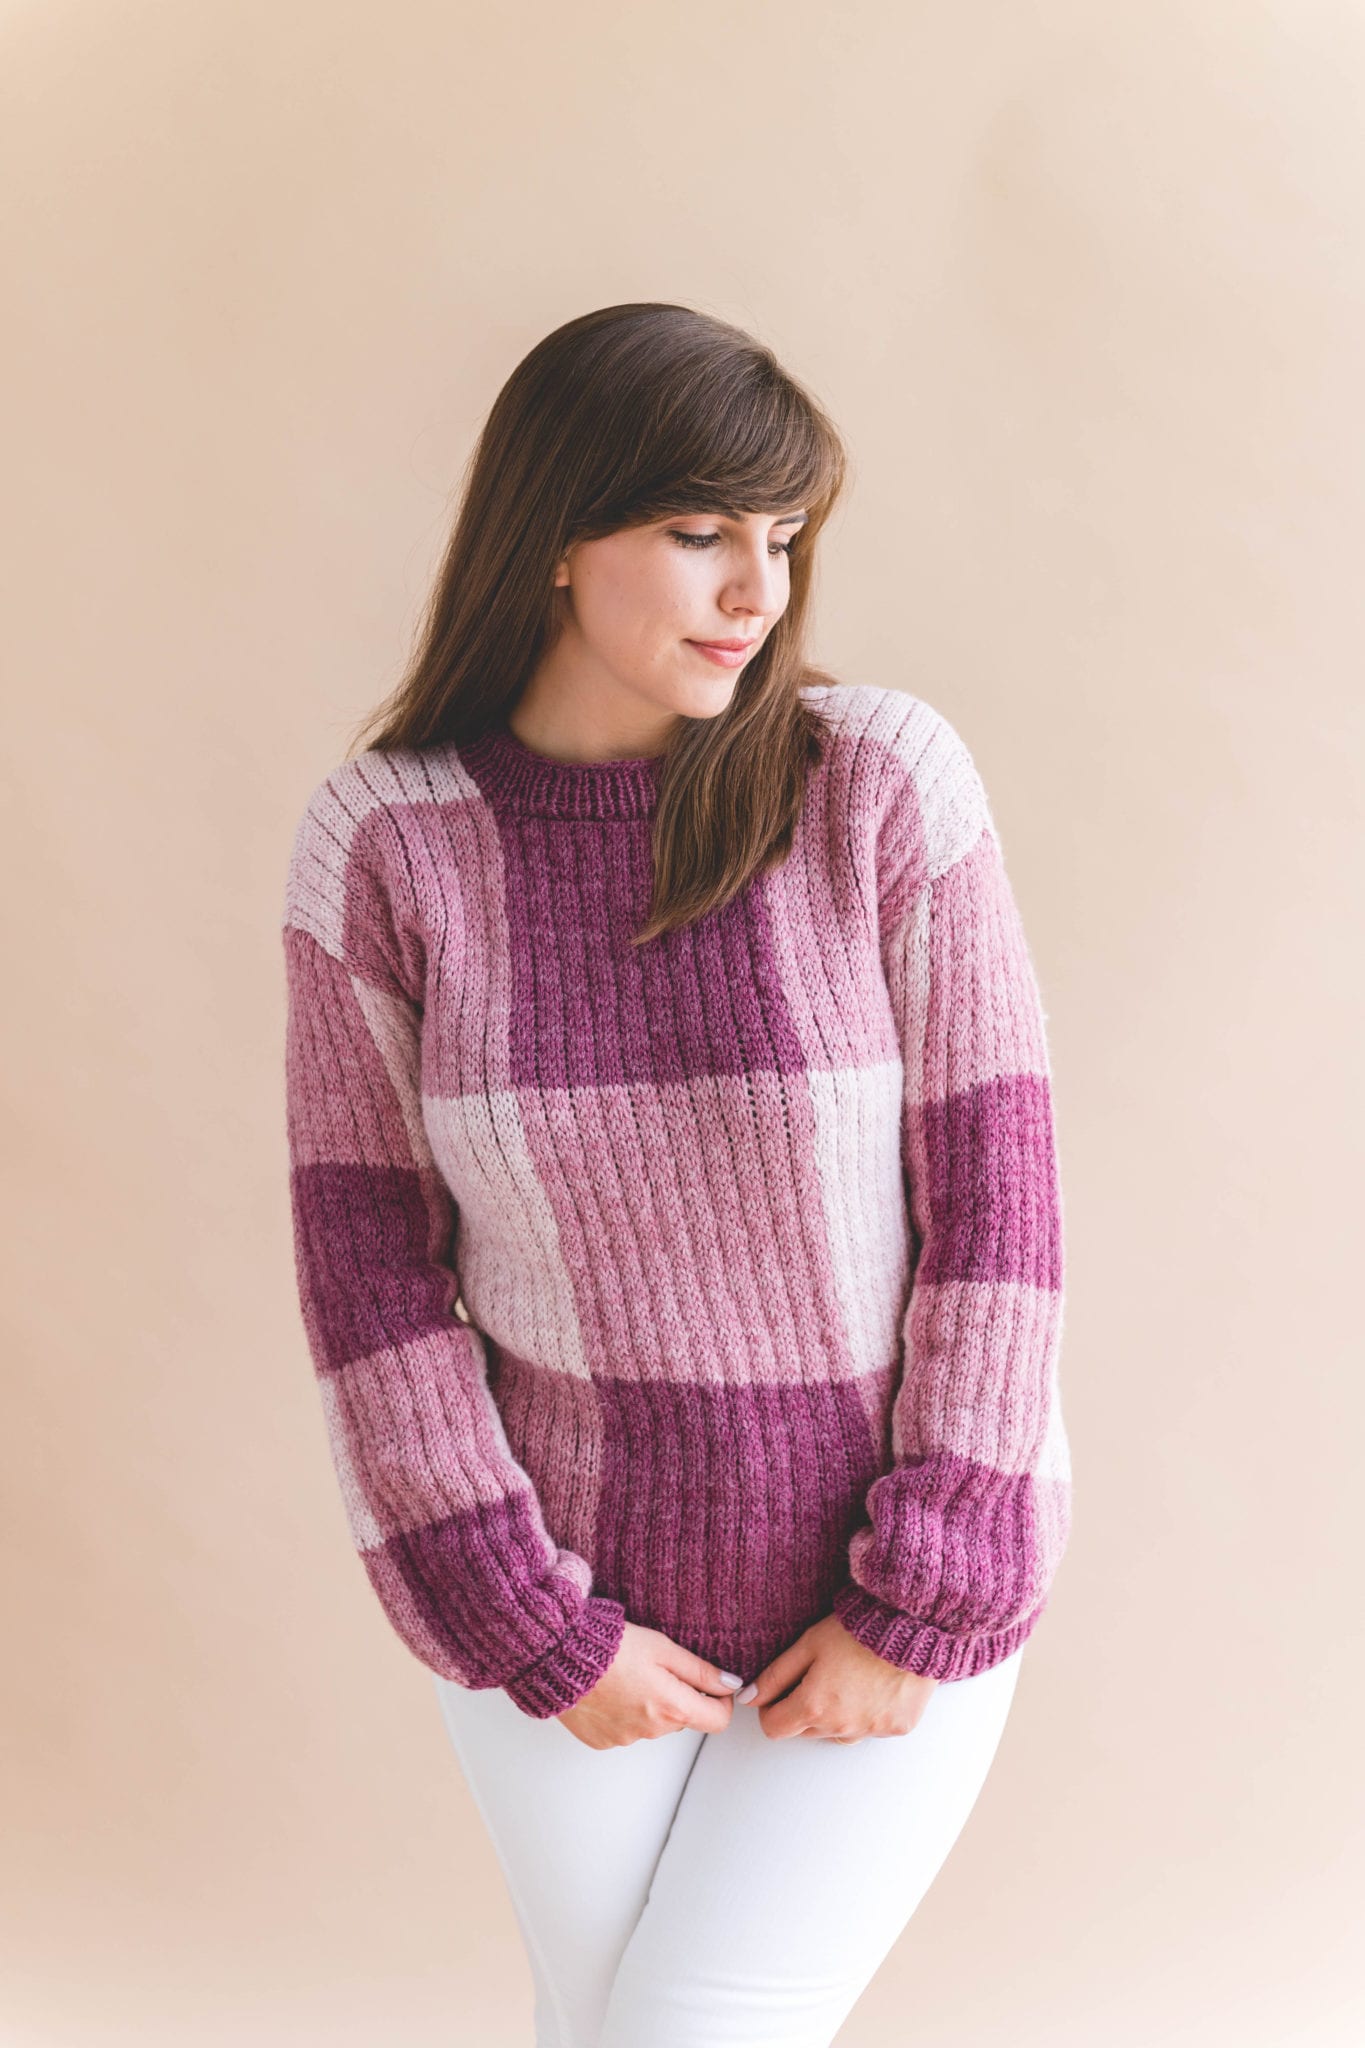
The inspiration explanation for this sweater is really simple – I saw a large scale gingham pullover sweater from Anthropologie (that’s sadly no longer in stock) and I knew I had to figure out a way to make my own! Simple stockinette and some colorwork proved just the ticket and I could not be happier with how this came together.
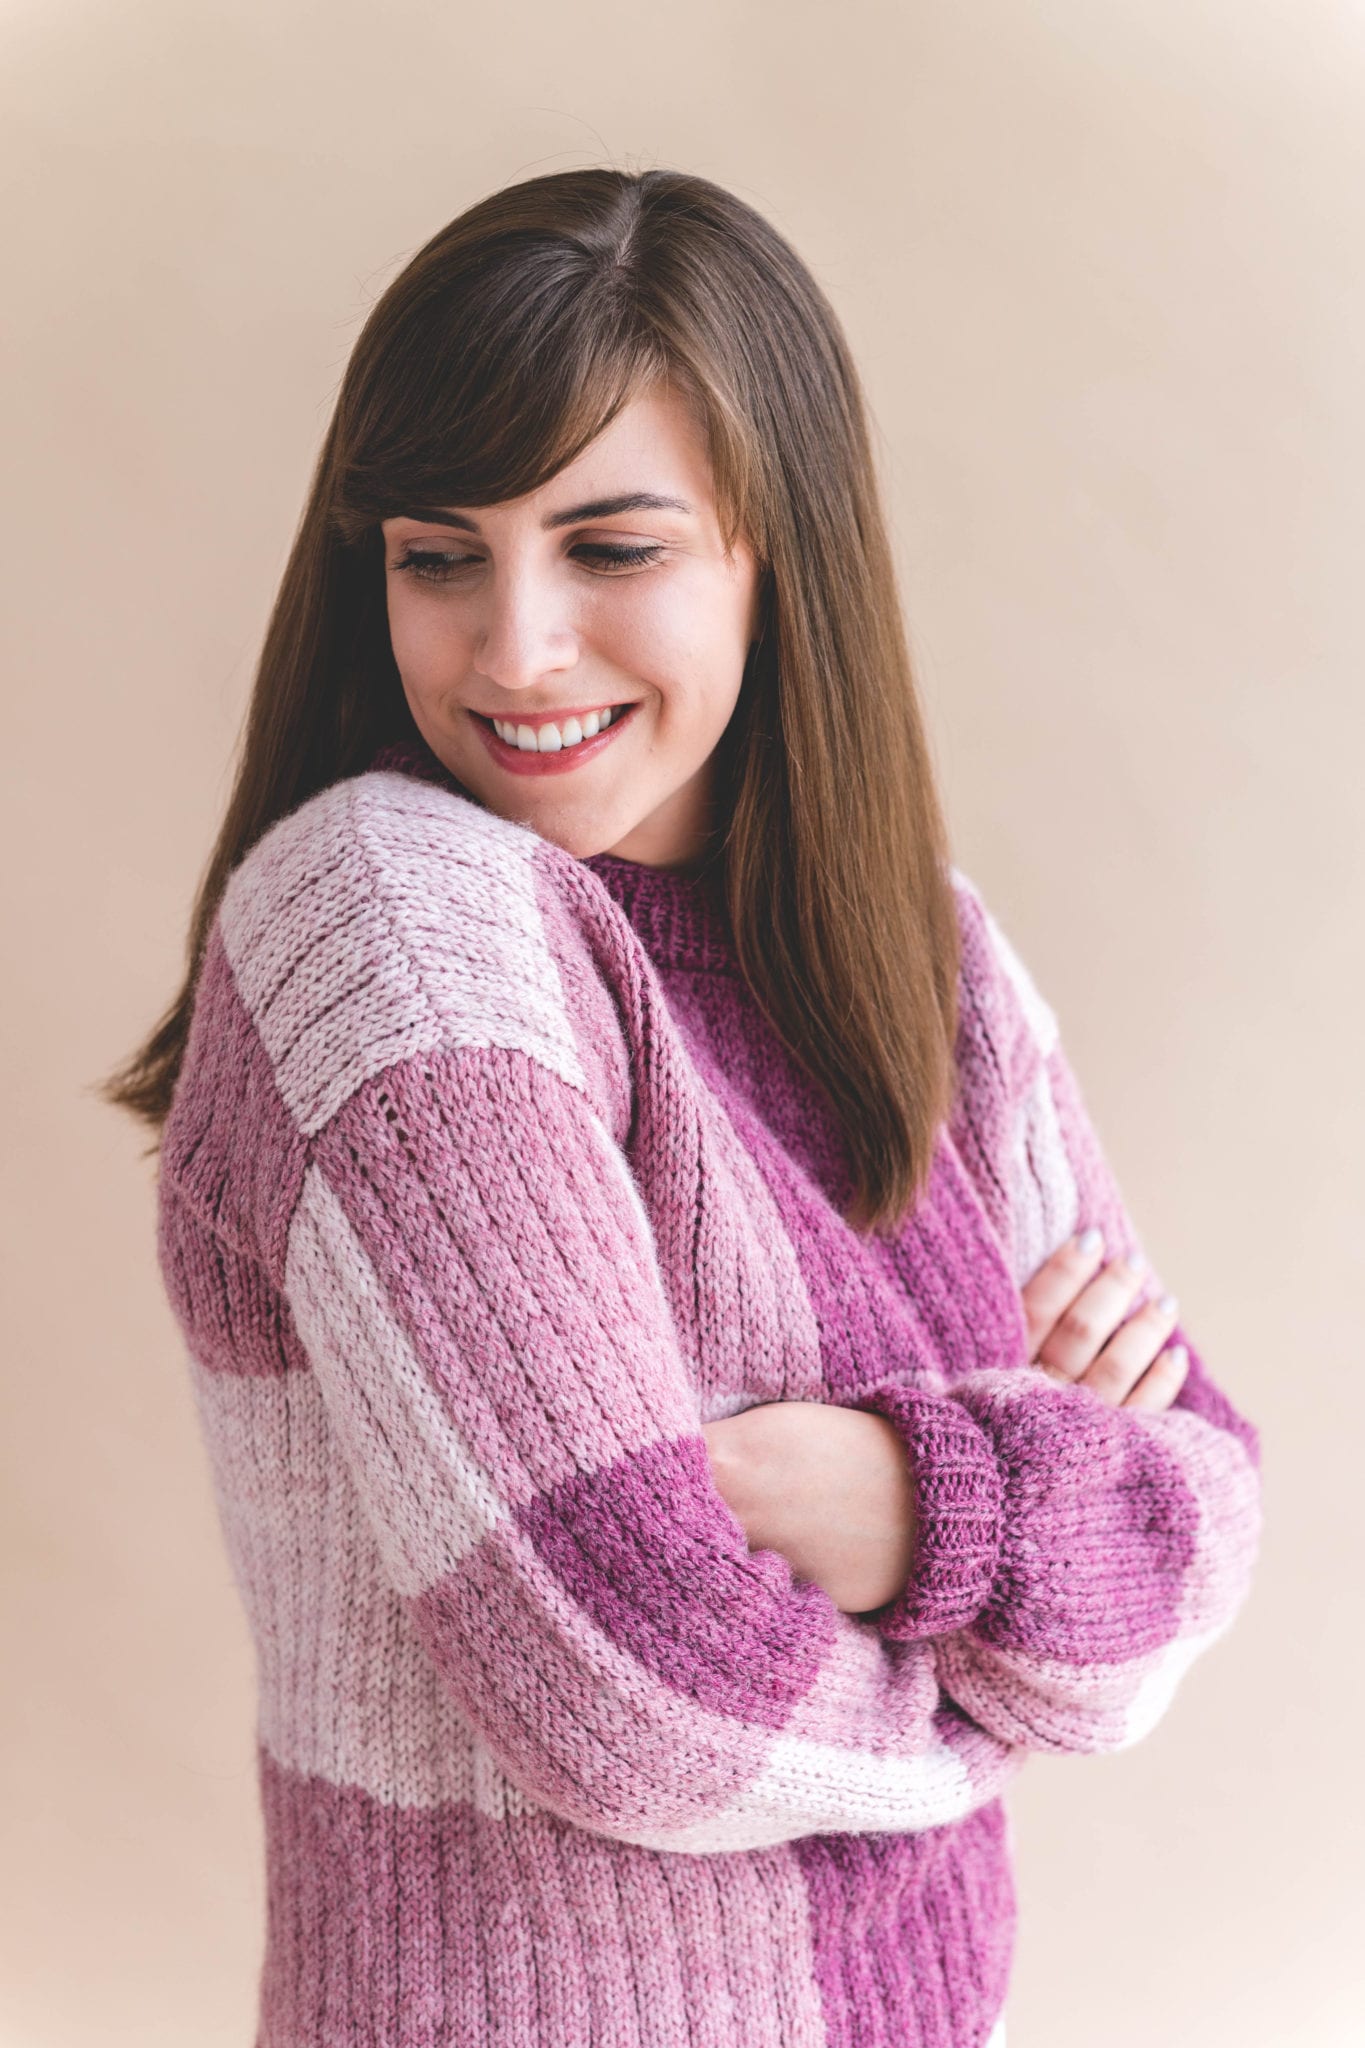
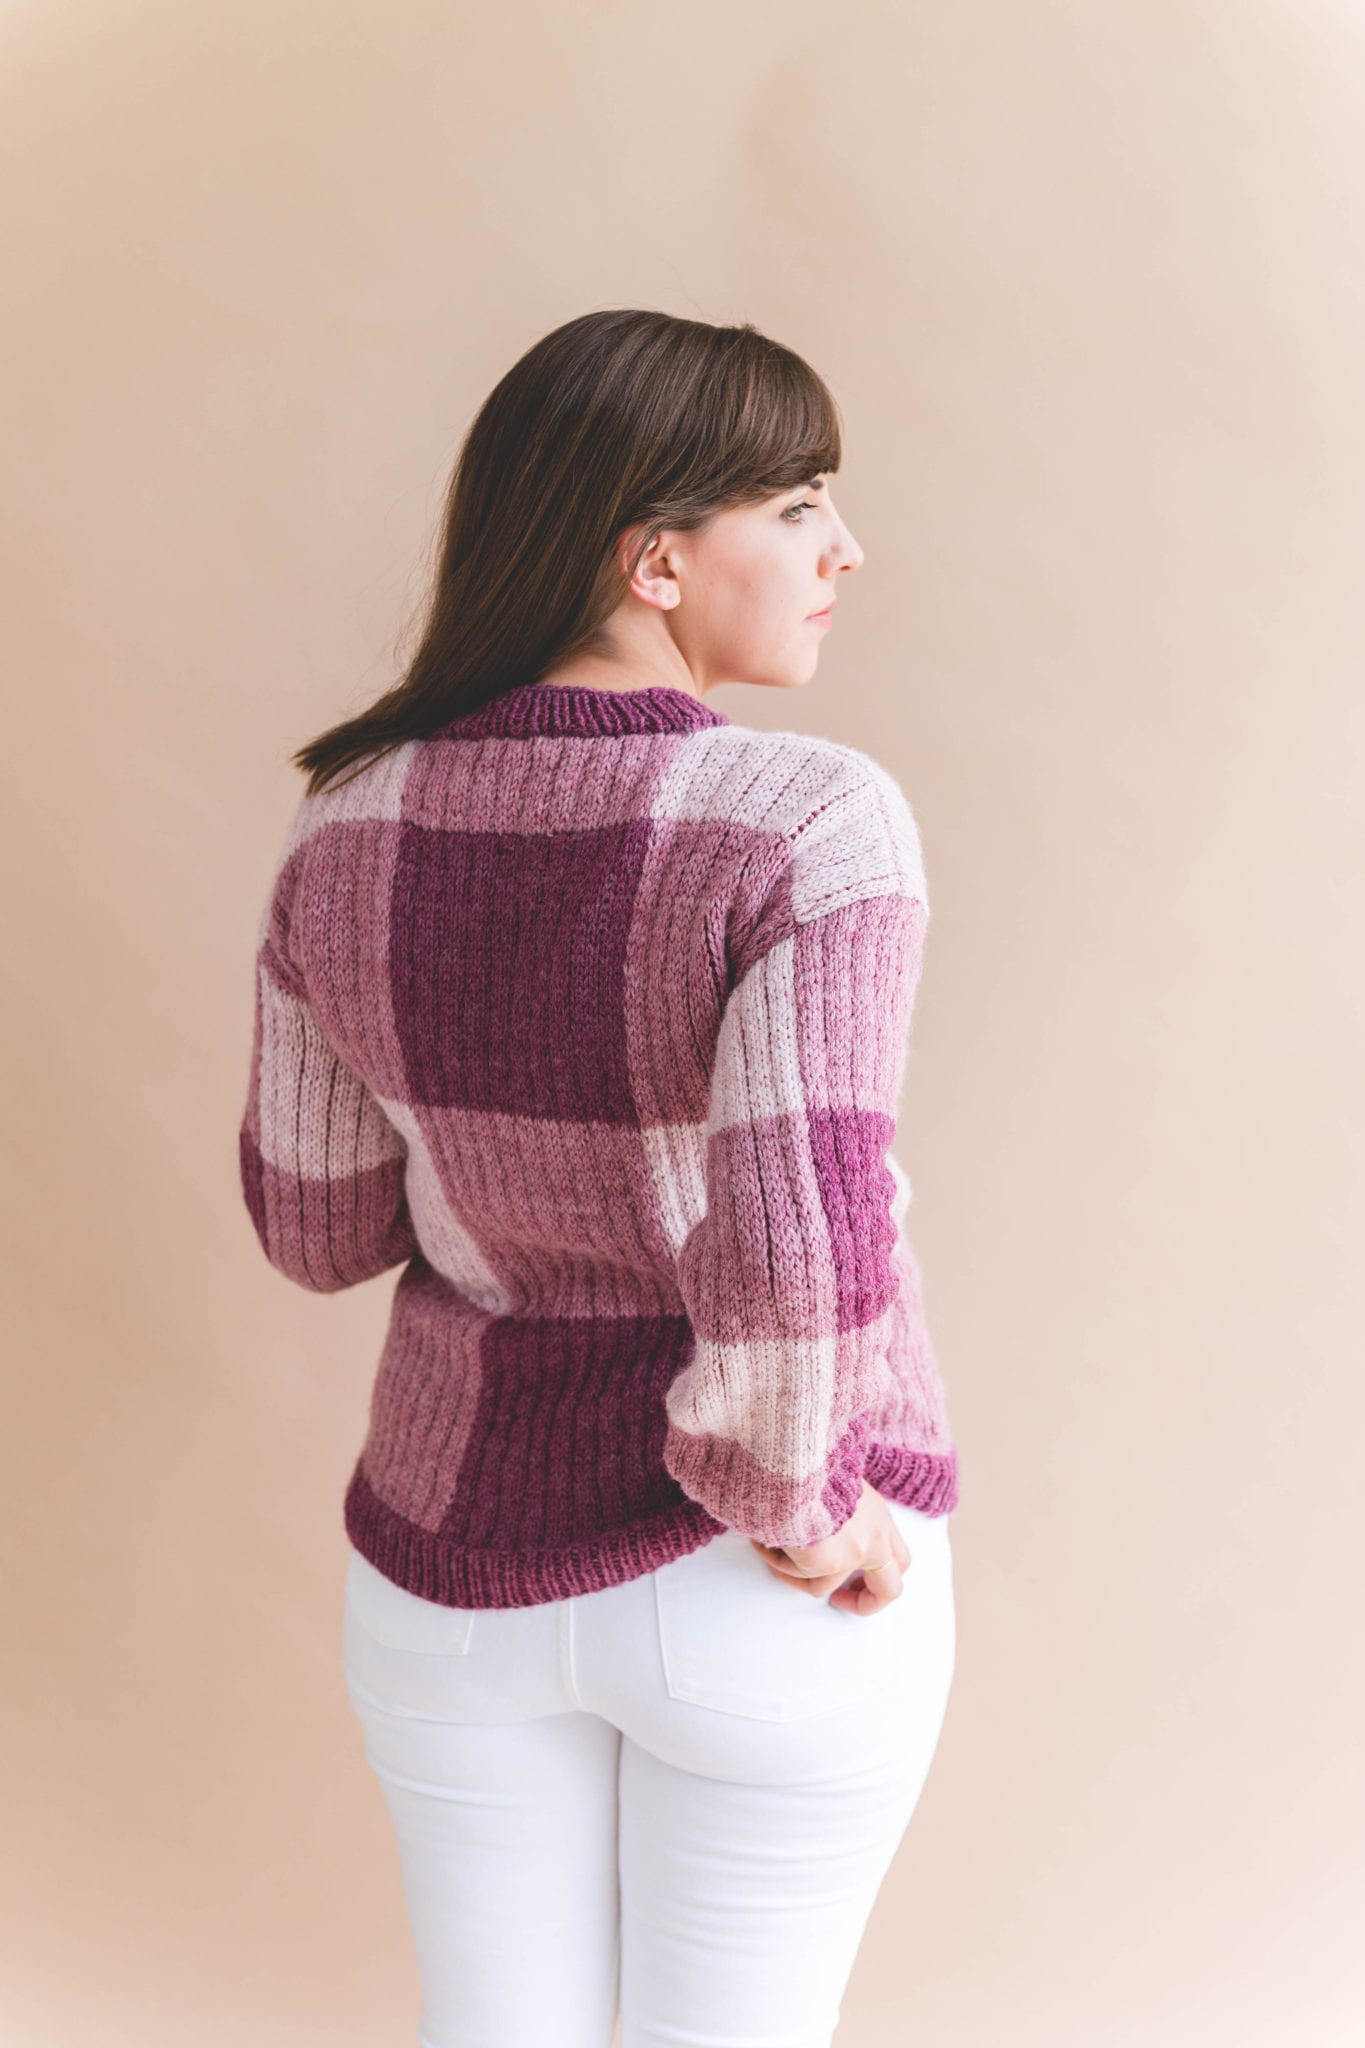
This sweater is made entirely of colorwork that gives it a textured look by catching floats behind the work as well as a double knit texture. This sweater is thick and warm, and oh so comfy.
Note: You could also knit this project in intarsia. Since I haven’t taught that technique here on the blog I stuck with stranded colorwork – but go where the wind takes you!
The Yarn
I used Lion Brand’s old classic Wool Ease Yarn for this pattern and I’m so glad I did! I chose it mostly because of the color choice. I knew I needed three shades of the same color and I needed a yarn that was lightweight and great to wear. Wool Ease is one of the most comfortable yarns to knit with and wear and the perfect three shades of blush really sealed the deal!
There are several ways to achieve a gingham look but I love this simple way of working with colors that already relate to each other so well. You could make a different gingham color scheme with a white, black and grey or a white mixed with medium and dark yarns of the same hue.
Pick up all the Wool Ease yarn you need here!

PATTERN
- Get the ad-free, large print, printable PDF pattern HERE.
- Grab the Ultimate Pattern Bundle that includes 150+ patterns just like this one on sale for $20 today HERE.
- PIN this pattern to your Pinterest boards for later HERE.
- Add this pattern to your Ravelry queue HERE.
To sum it up: Feminine and fun, the gingham pullover is knit with large blocked colorwork and the perfect blush color scheme. Vintage meets modern in this cozy sweater with simple knitting techniques in a creative application.
Materials:
–Lion Brand Wool Ease yarn (Weight: 4/Medium Worsted – 3oz, 197 yds)
Color 1: Blush Heather (2, 2, 2, 3, 3, 3, 3 skeins)
Color 2: Rose Heather (3, 3, 3, 4, 4, 4, 4 skeins)
Color 3: Dark Rose Heather (2, 2, 2, 3, 3, 3, 3 skeins)
Size US 7 / 4.5mm circular knitting needles – 36” cord
-Stitch Markers
-Tapestry needle
Gauge:
18 sts x 24 rows in stockinette = 4”
Sizes:
XS, S, M, L, XL, 2XL, 3XL
Finished Sweater Measurements:
Bust: 32 (36, 40, 44, 48, 52, 56)”
Length: 20 (20, 20, 21, 21, 22, 22)”
Sleeve (to underarm): 15.5 (16.5, 16.5, 16.5, 17.5, 17.5, 17.5)”
Armhole: 6 (6.5, 7, 7.5, 8, 8.5, 9, 9.5)”
Abbreviations (US terms):
CO – cast on
K – knit
P – purl
KFB – knit front back (increase)
St(s) – stitch(es)
Rpt – repeat
RS – right side
WS – wrong side
Skill Level:
Level 3 – Intermediate
Pattern Notes
-Sweater is shown in size M, model is 5’5” tall and true bust measures 38” for reference.
-Sweater is designed to have 2” positive ease. Size up if you’re between sizes.
-Sizing listed in the pattern will be in XS, Small, Medium, Large, XL, 2XL, and 3XL listed in parenthesis such as 72 (78, 90, 102, 108, 120, 126) whereas 72 for size XS, 78 for size S, 90 for size M, 102 for size L, 108 for size XL, 120 for size 2XL and 126 for size 3XL. When only one number is given, it applies to all sizes. To follow pattern more easily, print the pattern and circle/highlight all numbers pertaining to your size before beginning.
-Pattern is worked in flat panels from the bottom up – 2 front and back panels and 2 identical sleeve panels that are all seamed together at the end. Neckline ribbing is worked last by picking up stitches.
-Body colorwork requires changing color every 24 (26, 30, 34, 36, 40, 42) sts. I suggest loosely catching your floats every 3 stitches to maintain good tension. This will make your sweater double knit or twice as thick as one without colorwork. You may choose to knit in the intarsia style instead of stranding your colorwork.
-To achieve a gingham look, you’ll need three shades of the same color. You may substitute three of the same for a white/cream, a medium shade, and a dark shade of that color.
-In this pattern, Color 1 is blush heather, Color 2 is Rose Heather, Color 3 is Dark Rose Heather.
-This pattern is suitable for adventurous beginners – if you’re unsure about it, start with the sleeve. This holds all the most complicated elements of the pattern right at the beginning, if you can make the sleeve you can make the sweater!
Knit Gingham Pullover
Back Body Panel
With Color 3 CO 72 (78, 90, 102, 108, 120, 126) sts
Ribbing: Work in K 1, P 1 rib until your piece measures 2” (or 12 rows)
Body: Work stockinette stitch (K all RS rows, P all WR rows) beginning Body Colorwork
Body Colorwork
Rows 1-32: Work first 24 (26, 30, 34, 36, 40, 42) sts in Color 2, next 24 (26, 30, 34, 36, 40, 42) sts in Color 3, last 24 (26, 30, 34, 36, 40, 42) sts in Color 2
Rows 33-64: Work first 24 (26, 30, 34, 36, 40, 42) sts in Color 1, next 24 (26, 30, 34, 36, 40, 42) sts in Color 2, last 24 (26, 30, 34, 36, 40, 42) sts in Color 1
Rows 65-96: Work first 24 (26, 30, 34, 36, 40, 42) sts in Color 2, next 24 (26, 30, 34, 36, 40, 42) sts in Color 3, last 24 (26, 30, 34, 36, 40, 42) sts in Color 2
Rows 97-108: Work first 24 (26, 30, 34, 36, 40, 42) sts in Color 1, next 24 (26, 30, 34, 36, 40, 42) sts in Color 2, last 24 (26, 30, 34, 36, 40, 42) sts in Color 1
Cast off, weave ends.
Front Body Panel
Repeat Back Body Panel through Row 96.
Row 97: Work first 24 (26, 30, 34, 36, 40, 42) sts in Color 2, cast off 24 (26, 30, 34, 36, 40, 42) sts in Color 3 (taking care to carry other color along with cast off to maintain the texture of your sweater), work last 24 (26, 30, 34, 36, 40, 42) sts in Color 2
Right Shoulder
*Note: When working the shoulders you want to still carry a second color behind (even though you won’t be using it) to maintain consistent gauge/texture/drape
Rows 98-109: Beginning with a WS row, working just on the right side of the front panel, Work 24 (26, 30, 34, 36, 40, 42) sts in Color 1
Cast off, weave ends.
Left Shoulder
Rows 98-109: Join yarn to the first left shoulder stitch after Cast off 24 (26, 30, 34, 36, 40, 42) on the RS, working just on the left side of the front panel, Work 24 (26, 30, 34, 36, 40, 42) sts in Color 1
Cast off, weave ends.
Sleeves
*make 2
With Color 3 CO 28 (30, 32, 33, 34, 36, 37)
Ribbing: Work in K 1, P 1 rib until your piece measures 2.5” (or 18 rows)
Increase Rows:
Sizes XS, M, XL, 3XL: K first st, KFB each remaining st across <57, 63, 69, 75>
Sizes S, L, 2XL: KFB each st across <60, 66, 72>
Work K1 P1 rib back across the sleeve so that you will begin color work on a knit/right side row.
Sleeve: Work stockinette stitch (K all RS rows, P all WR rows) beginning Sleeve Colorwork
Sleeve Colorwork
Rows 1-22: Work first 19 (20, 21, 22, 23, 24, 25) sts in Color 2, next 19 (20, 21, 22, 23, 24, 25) sts in Color 3, last 19 (20, 21, 22, 23, 24, 25) sts in Color 2
Rows 23-44: Work first 19 (20, 21, 22, 23, 24, 25) sts in Color 1, next 19 (20, 21, 22, 23, 24, 25) sts in Color 2, last 19 (20, 21, 22, 23, 24, 25) sts in Color 1
Rows 45-66: Work first 19 (20, 21, 22, 23, 24, 25) sts in Color 2, next 19 (20, 21, 22, 23, 24, 25) sts in Color 3, last 19 (20, 21, 22, 23, 24, 25) sts in Color 2
Rows 67-88: Work first 19 (20, 21, 22, 23, 24, 25) sts in Color 1, next 19 (20, 21, 22, 23, 24, 25) sts in Color 2, last 19 (20, 21, 22, 23, 24, 25) sts in Color 1
Cast off, weave ends.
Assembly
With a long piece of spare Color 1 yarn thread on a tapestry needle, seam shoulders (Color 1 cost off edge of front and back panels on each side).
Weave ends.
With RS facing you, lie sleeve flat and match center of last sleeve row to the shoulder seam of your front and back panels.
With a long piece of Color 2 yarn, seam sleeve to shoulder all the way across the sleeve cast off row.
Repeat on other sleeve.
Fold back and front panels together with WS together (RS facing out).
With a long piece of Color 2 yarn, seam sleeve and body side seam all at once starting with the sleeve ribbing and continuing past the underarm down the side of the body.
Repeat on the other side. Weave ends.
Neckline Ribbing
With Color 3 pick up: 24 (26, 30, 34, 36, 40, 42) sts across the back panel center cast off edge, 24 sts along left shoulder edge, 24 (26, 30, 34, 36, 40, 42) sts across front panel center cast off edge, and another 24 sts along right shoulder edge <96, 100, 108, 116, 120, 128, 132>
Decrease Row: K 4 K2tog; Rpt around, Sizes L and 3XL only K2tog once more, K remaining 0 (4, 0, 0, 4, 2, 0) sts <80, 84, 90, 96, 100, 107, 111>
Ribbing: Work in K 1, P 1 rib until your neckline ribbing measures 1.5” (or 9 rows)
Cast off, weave all ends.
OTHER SPRING ESSENTIAL FREE CROCHET PATTERNS
1. Crochet Elle Convertible Shawl / 2. Crochet Rancher Poncho / 3. Crochet Audrey Tunic
I love the look and shape of this sweater! Beautiful Ashleigh! I hope to make this one day when I’ve had some practice with knitting garments!! ????????????
Wouldn’t it have been easier to knit in intarsia instead fo carrying the yarn across the back? Anyway, very cute sweater!
You totally could! I try to gear everything toward extreme beginners though and stranded seems to be easier to get the hang of 😉
I’m amazed at this beautiful design. Great job Ashleigh!!!
What a gorgeous sweater, Ashleigh! Thanks for the fabulous step-by-step photos, especially of the reverse side showing the stranded colorwork. Showing what the reverse should look like is especially helpful for us newbies! ????
If this is all knit in stockinette, what makes it look ribbed? Is that an effect created by catching the floats every three stitches? If so, seems that would be important to achieving the final look…?
Wondering
Sandy, you’re exactly right and that information is listed in the notes of the pattern 🙂
Beautiful work! I have a question, though. One of the features I find most attractive about this sweater is the subtle ridges throughout… how do you achieve that with just stockinette stitch?
Very, very nice. Magnifique,.
why do your pics look as though the sweater is knit in K2P1 rib? is it because you catch your floats every three stitches? This is a lovely design and I will surely give it a try.