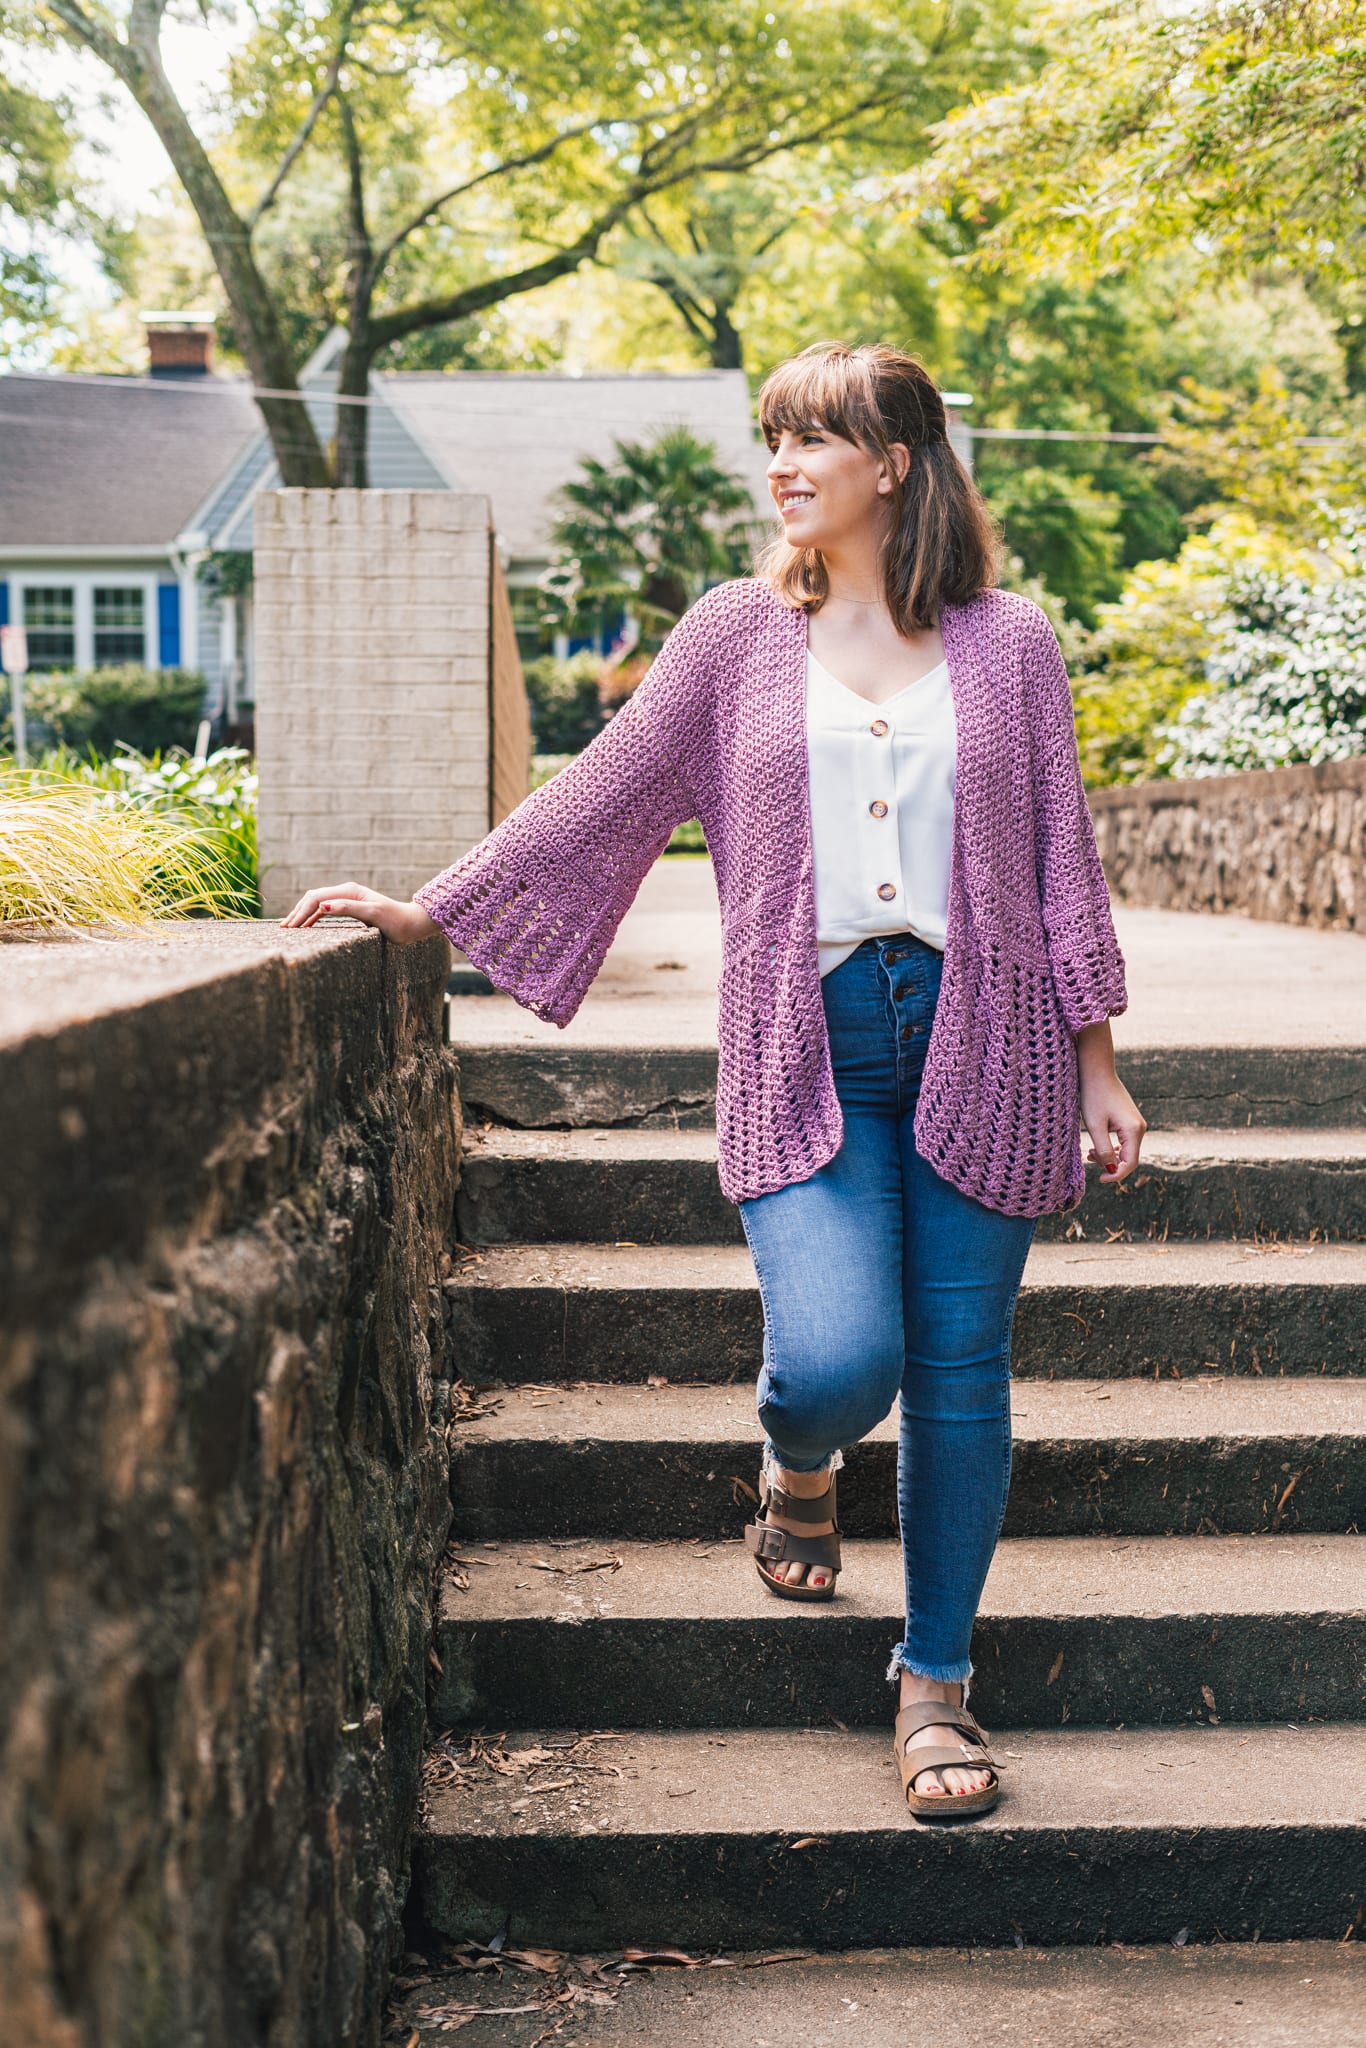
A sweater worth loving – my Hydrangea Crochet Cardigan – is a free pattern here on the blog!
Read through my inspiration, design process, and lots of info on the perfect yarn I chose, or scroll on down for the free pattern.

The Inspiration + Design
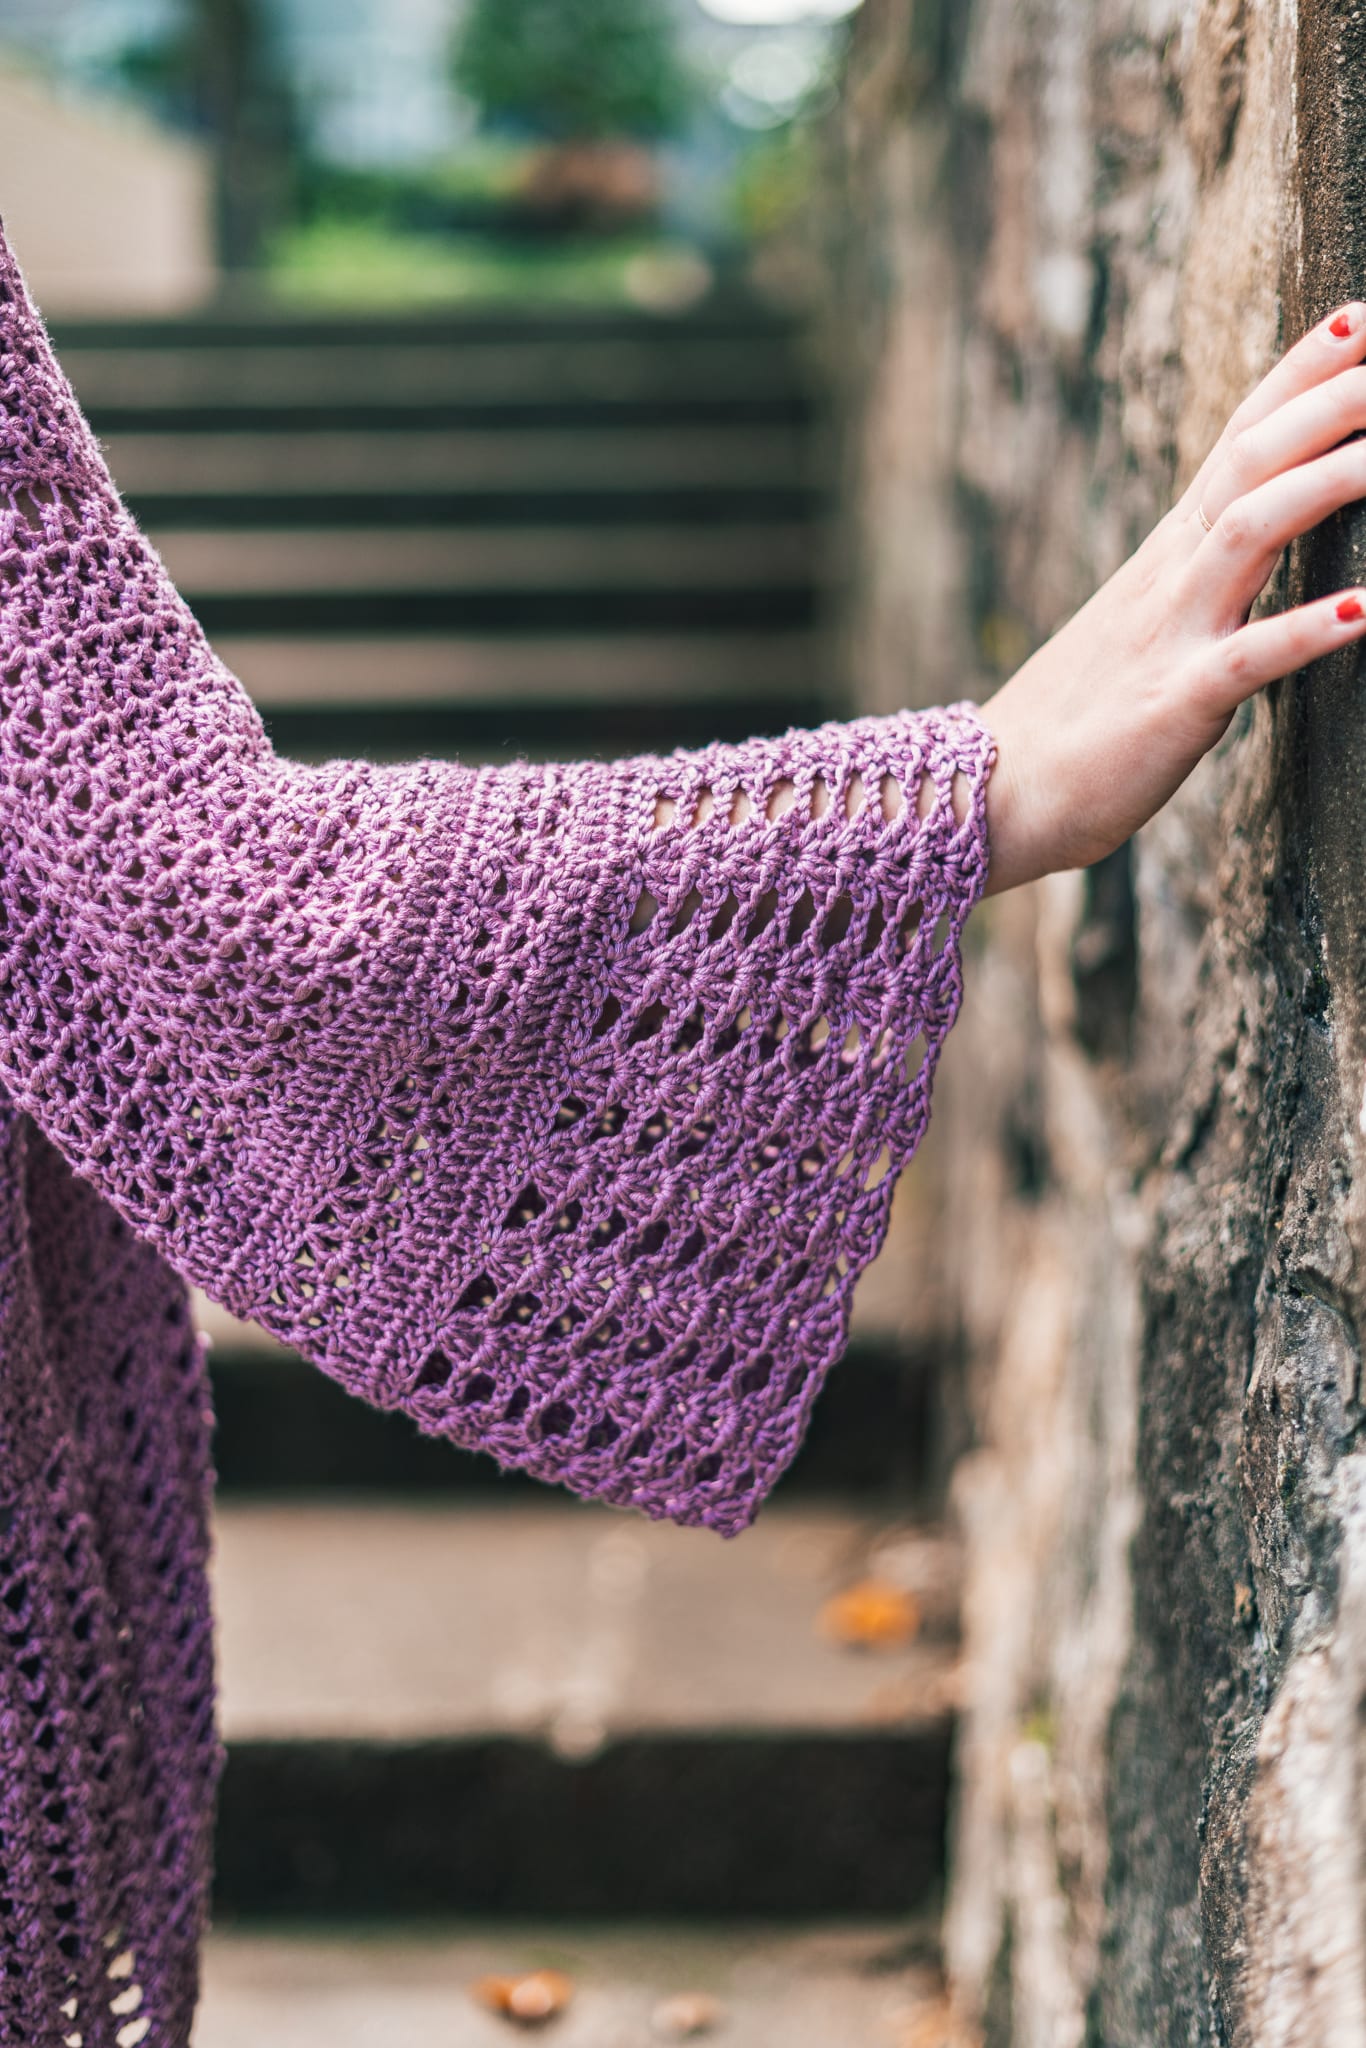
It had been about a year since making my last crochet cardigan so I knew it was time for another! This time with lacy stitches and a flowy bohemian sleeve that’s cool and comfortable.
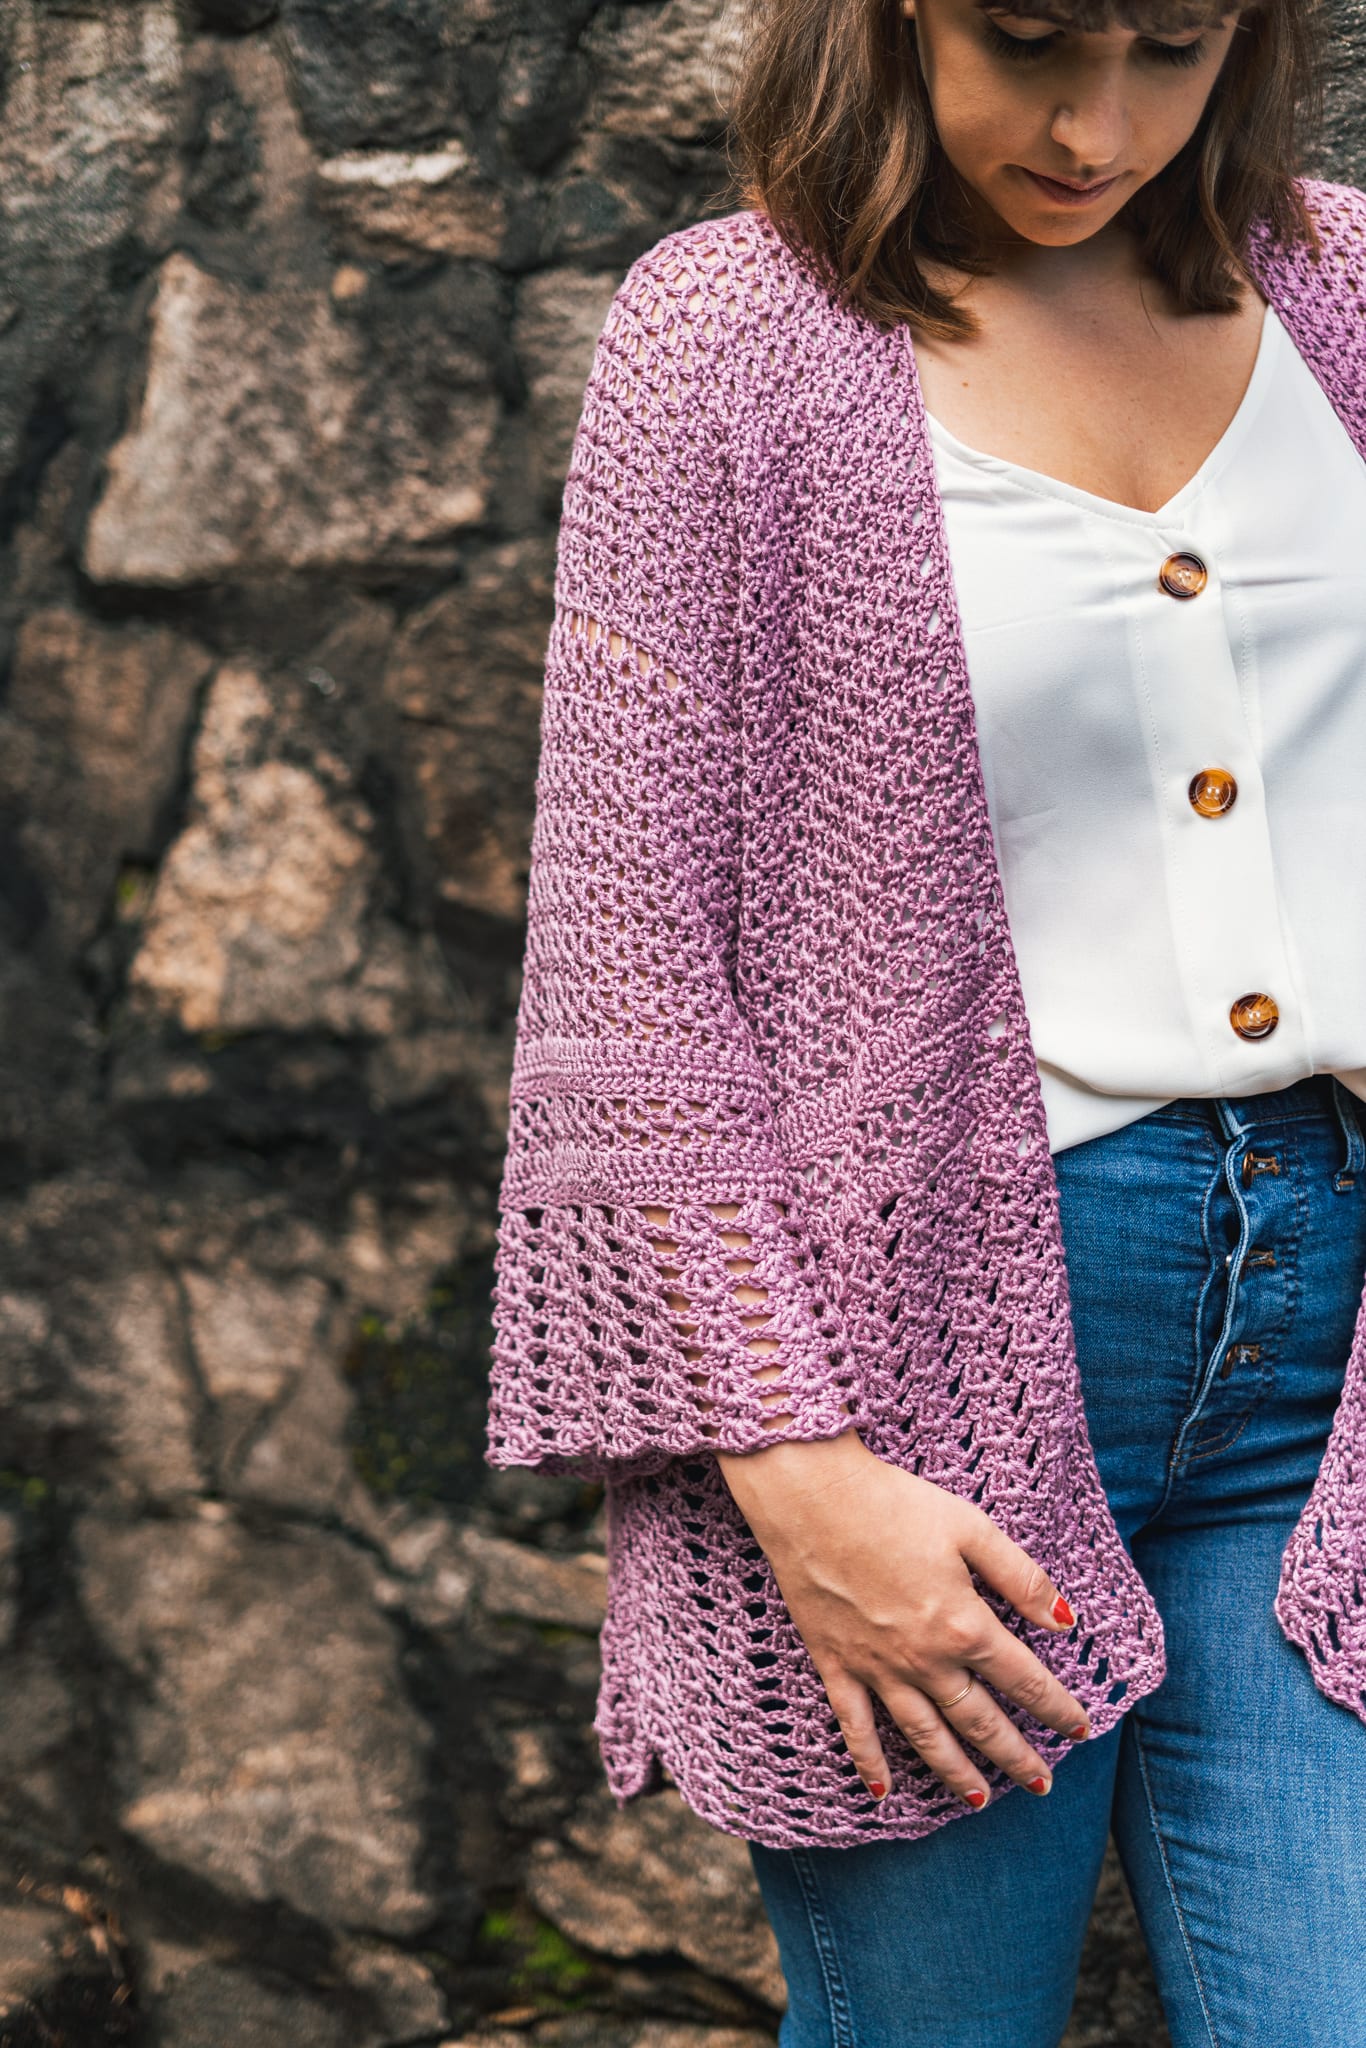
It was hard to choose what types of crochet lace stitches to use for this sweater. Being that we’re making a garment, I didn’t want to do anything too complicated just so that the pattern was easy to follow. I chose a simple V stitch for the bodice, some waist detail in simple double crochet with a simple fan stitch section at the hip. This same sequence is repeated in the sleeve and I love the extremely feminine, dainty look of the whole sweater!

Can a beginner really make this crochet cardigan?
I believe the answer is yes! I designed this cardigan to consist of only rectangle shaped pieces. If you are comfortable with the V stitch and fan stitches used in the pattern, you can make this project. There is no fussy shaping or increases/decreases to make it confusing. That drape and fit is all a product of the yarn I chose, not fancy shaping!

The Yarn
I chose to use Lion Brand Truboo for this project. It’s a newer yarn that launched earlier this year and I hadn’t gotten a chance to try it out yet so I used the Mauve skeins in my stash to work on my sweater! Let me tell you guys, this was absolutely the right yarn for this piece. It’s so silky and soft with excellent drape and movement. It’s extremely comfortable to wear as well as a pleasure to crochet with.
I can’t stress to you enough how much I LOVE the color palette of Truboo yarn. There are loads of options from dusty neutrals to bright summer tones so you can really choose a color to fit any style.


PATTERN
- Get the ad-free, large print, printable PDF pattern HERE.
- Grab the Ultimate Pattern Bundle that includes 150+ patterns just like this one on sale for $20 today HERE.
- PIN this pattern to your Pinterest boards for later HERE.
- Add this pattern to your Ravelry queue HERE.
Description:
An oversized lacy crochet cardigan for the summer months inspired by the delicate beauty of my garden. This project has just enough interest with two different lace stitches to keep it engaging without being complicated – it’s made entirely from rectangles! Lightweight Truboo yarn is silky and light on the skin with breathable texture to keep you cool and comfortable. Loose boho sleeves nod to the laid back look and are surprisingly easy to make.
Materials:
–Lion Brand Truboo yarn
(Weight 3/light, 3.5 oz/100g, 241 yds/220 m)
(5, 6, 6, 7, 8, 9, 10, 10) skeins in Mauve
Or (1120, 1290, 1450, 1570, 1800, 1980, 2220, 2410) yds
Shop all of my favorite tools & materials HERE!
Sizes:
XS, S, M, L, XL, 2XL, 3XL, 4XL
Gauge:
18 sts x 8 rows in dc = 4″
Finished Sweater Measurements:
Bust: (32, 36, 40, 42.5, 48, 52, 57.5, 61.5)
Length: (29.5, 30, 30.5, 31, 31.5, 32, 32.5, 33)
Sleeve (to underarm): (12.5, 13, 13.5, 14, 14.5, 15, 15.5, 16)
Armhole: (8, 8.5, 9, 10, 10, 10.5, 11, 11)
Skill Level:
Level 2 – Easy
Pattern Notes
-Sweater is shown in size M, model is 5’5” tall and true bust measures 38” for reference. This pattern has 10” positive ease built in. Size down for a more fitted look.
-Sizing listed in the pattern will be in XS, Small, Medium, Large, XL, 2XL, 3XL, and 4XL listed in parenthesis such as (95, 106, 117, 128, 139, 150, 161, 170) whereas 95 for size XS, 106 for size S, 117 for size M, 128 for size L, 139 for size XL, 150 for size 2XL, 161 for size 3XL and 170 for 4XL. When only one number is given, it applies to all sizes. To follow pattern more easily, print the pattern and circle/highlight all numbers pertaining to your size before beginning.
-Pattern is worked in flat panels from the top down – 1 back panel and 2 front panels. 2 identical sleeve panels that are all assembled in the final step.
-Ch 3 counts as a stitch throughout.


Hydrangea Crochet Cardigan
Back Panel
*make 1
V Stitch Section
Ch (74, 80, 92, 98, 110, 116, 128, 140)
Row 1: Skip 3 sts (counts as a stitch throughout), Dc in fourth ch from hook, ch 1, skip 2, (dc, ch 1, dc) in next stitch, *skip 2, (dc, ch 1, dc; rep from * until 4 stitches remain, ch 1, skip 2, dc in last 2 stitches, turn <52, 56, 64, 68, 76, 80, 88, 96 dc>
Row 2: Ch 3, dc, ch 1, skip to center ch 1 of V stitch, *(dc, ch 1, dc) into ch 1 space; rep from * in all V stitches across to last V stitch, ch 1, dc in last two stitches, turn
Rep row 2 until panel measures (13, 13.5, 14, 14.5, 15, 15.5, 16, 16.5)” or you’ve completed (26, 27, 28, 29, 30, 31, 32, 33) rows.
Waist
Rows 1-2: Ch 2, dc in each st acrss (including all ch-1 spaces), turn <72, 78, 90, 96, 108, 114, 126, 138 dc>
Rows 3-4: Ch 3, dc, ch 1, *skip 2, (dc, ch 1, dc) into next stitch; rep from * until 4 stitches remain, ch 1, skip 2, dc in last 2 stitches, turn <52, 56, 64, 68, 76, 80, 88, 96 dc>
Rows 5-6: Ch 2, dc in each st acrss (including all ch-1 spaces), turn <72, 78, 90, 96, 108, 114, 126, 138 dc>
Fan Stitch Section
Row 1: Ch 2, dc in the first stitch, ch 2, skip 2, (2 dc, ch 1, 2 dc) in next stitch, *ch 2, skip 5, (2 dc, ch 1, 2 dc) in next stitch; rep from * until 3 stitches remain, ch 2, skip 2, dc in last stitch, turn <52, 56, 64, 68, 76, 80, 88, 96 dc>
Row 2: Ch 2, dc in first stitch, *ch 2, skip to center ch-1 of next fan stitch, (2 dc, ch 1, 2 dc) into ch-1 space; rep from * across, ch 2, skip to dc in last stitch, turn
Rep row 2 until panel measures 11.5″ or 23 rows.

Front Panels
*make 2
Ch (38, 44, 50, 50, 56, 62, 68, 71)
Repeat V Stitch, Waist and Fan stitch section as for back panel.
Sleeves
*make 2
Ch (80, 86, 92, 98, 98, 104, 110, 110)
Repeat V stitch section until panel measures (5, 5.5, 6, 6.5, 7, 7.5, 8, 8.5)” or (10, 11, 12, 13, 14, 15, 16, 17) rows.
Repeat all of Waist section.
Repeat Fan Stitch Section until panel measures 5″ or 9 rows.
ASSEMBLY
Shoulder seams: Lie back panel with wrong side up, lie front panels with wrong side up aligning the foundation chains to sew shoulder seams. Sew with a whip stitch. Weave ends.

Sleeve seams: Leaving front and back panels as they are, lie sleeve panels with wrong sides up on either side as pictured. Align center of the sleeves with shoulder seams by measuring the center or counting stitches in from each side. Place a stitch marker to keep this in place if you like. Sew with a whip stitch. Weave ends

Side seams: Fold sweater longways along the shoulder seam as pictured. It should look more like a cardigan now!

Sew with a whip stitch along the side seam, to the underarm, and along the sleeve seam. Weave ends.

Abbreviations (US terms):
ch – chain
dc – double crochet
sk – skip
st(s) – stitch(es)
<> – stitch count
OTHER FREE CARDIGAN PATTERNS

1. Crochet Everyday Cotton Cadigan / 2. Knit Betty Cardigan / 3. Crochet Slouchy Stripe Cardigan
The ravelry link above does not link to this pattern 😬🤔
Oops! I fixed it above, thanks for pointing that out. Here’s the link: https://www.ravelry.com/patterns/library/hydrangea-cardigan-3
Absolutely beautiful sweater!
Is this included in the ultimate pattern bundle? I really want this as a PDF because I have a program I use on my phone. However if it’s part of the bundle I’ll just buy that now
It’s not included currently!
Just Beautiful!
This cardigan is so pretty Ashleigh. It was well worth the wait.
Hi. I love this sweater but I have lots of ZZ twist to use. Would that work here? I know they’re different weights and the pattern would need to be adjusted. Just wondering.
Thanks,
Lisa
You could try making a gauge swatch and see how far off you are. Since this cardigan isn’t a fitted design you might be able to get away with making one size smaller than you’d usually make with your heavier weight zz twist yarn and its recommended hook size. This way you’re making fewer stitches than your size would require but with a larger yarn and larger hook and that would put you somewhere around a correctly fitting cardigan. Best of luck!
Hi, I am trying to make this cardigan and have a dumb question. How do you tell which side is right or wrong? Thanks so much!