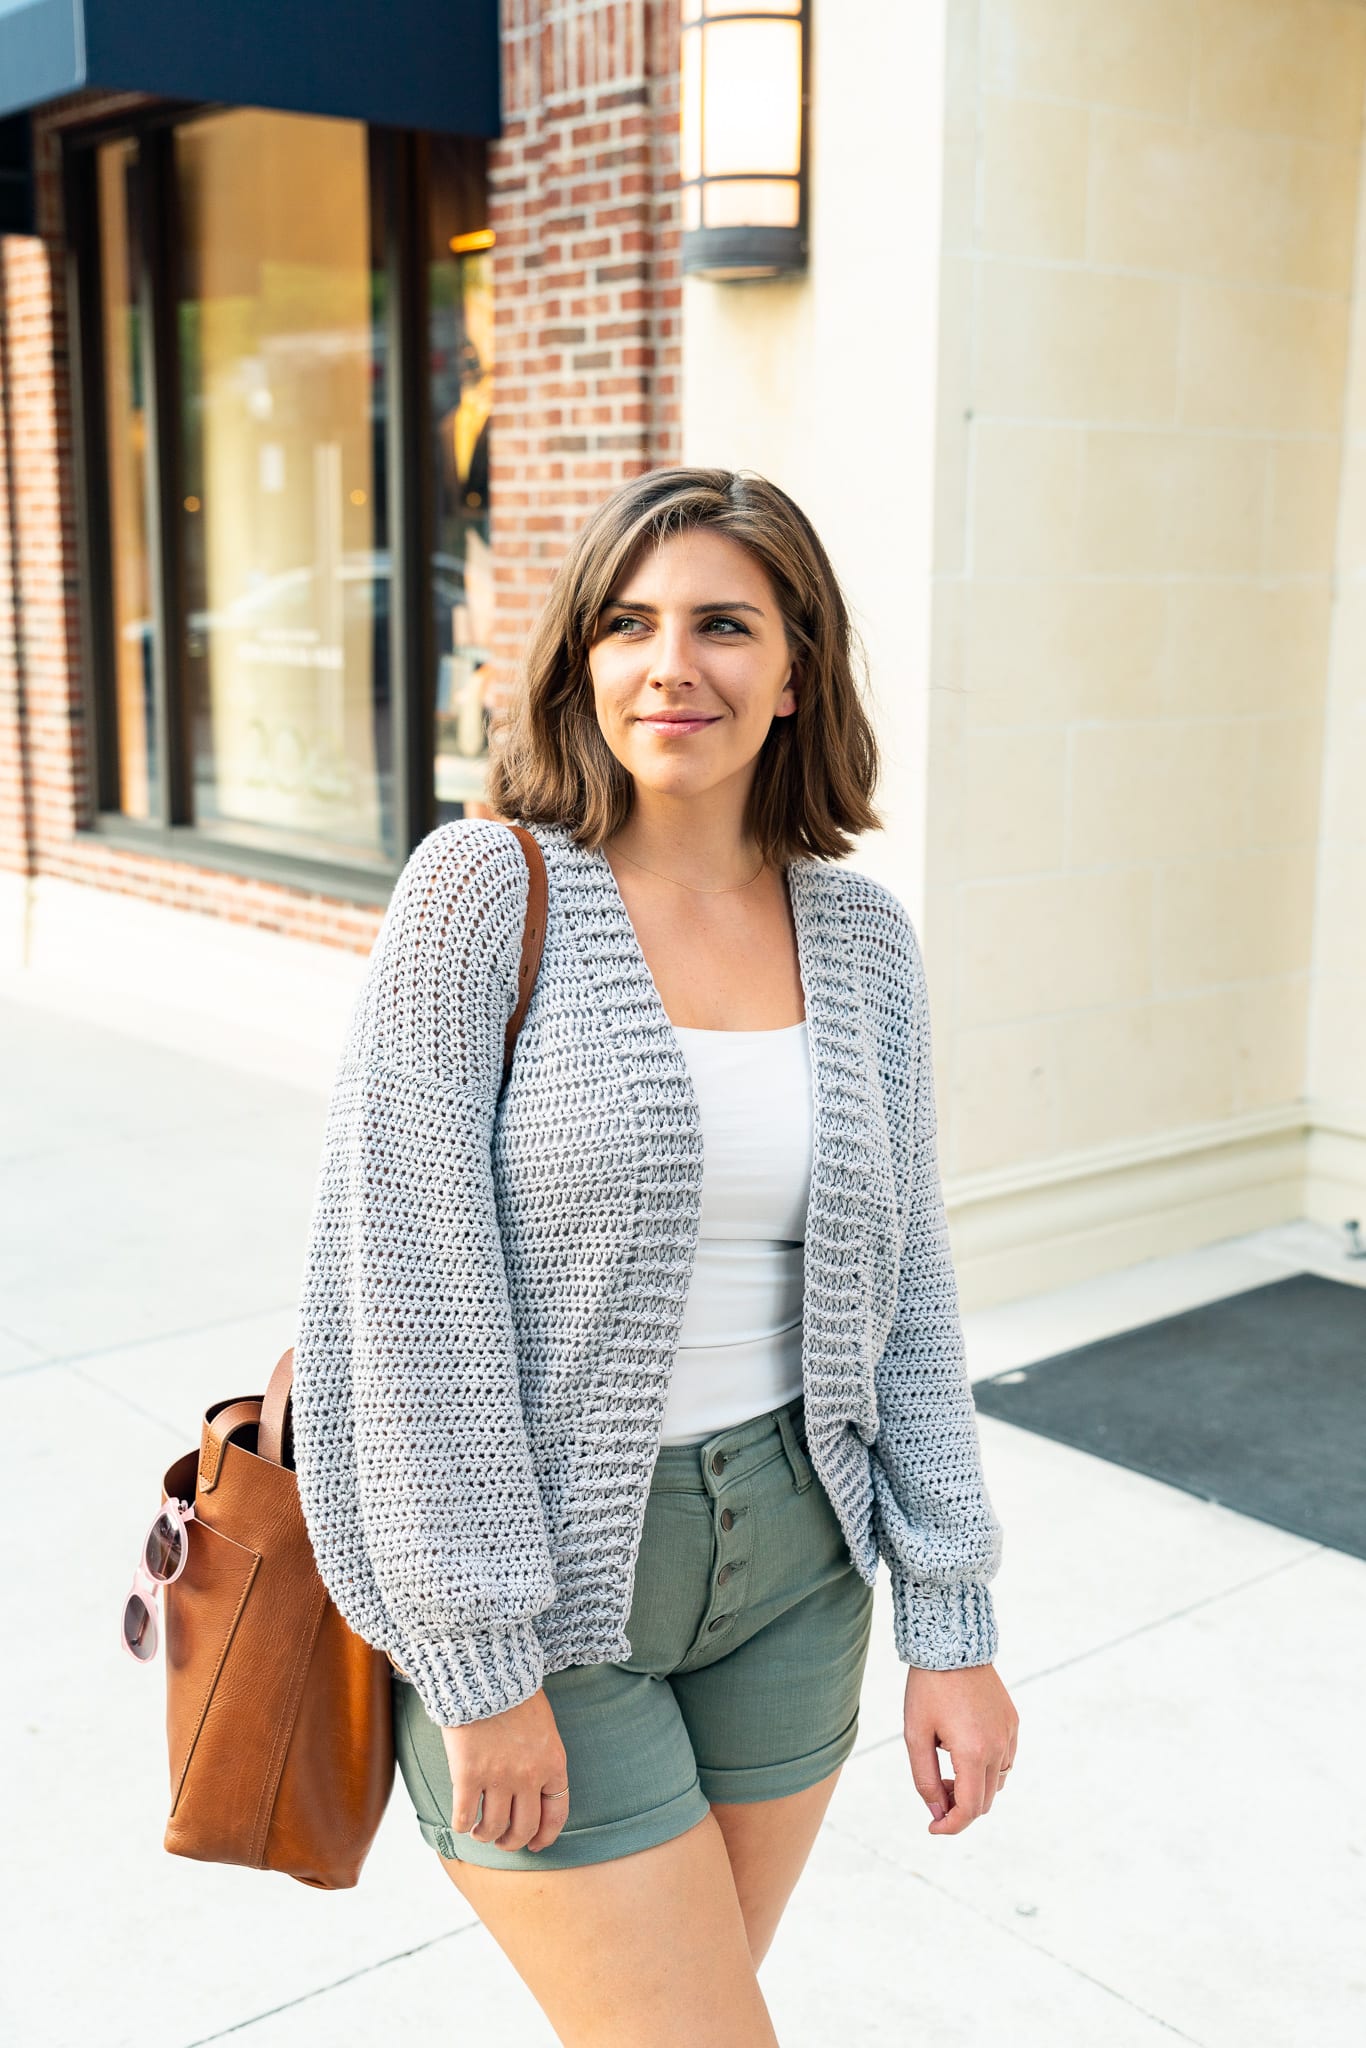
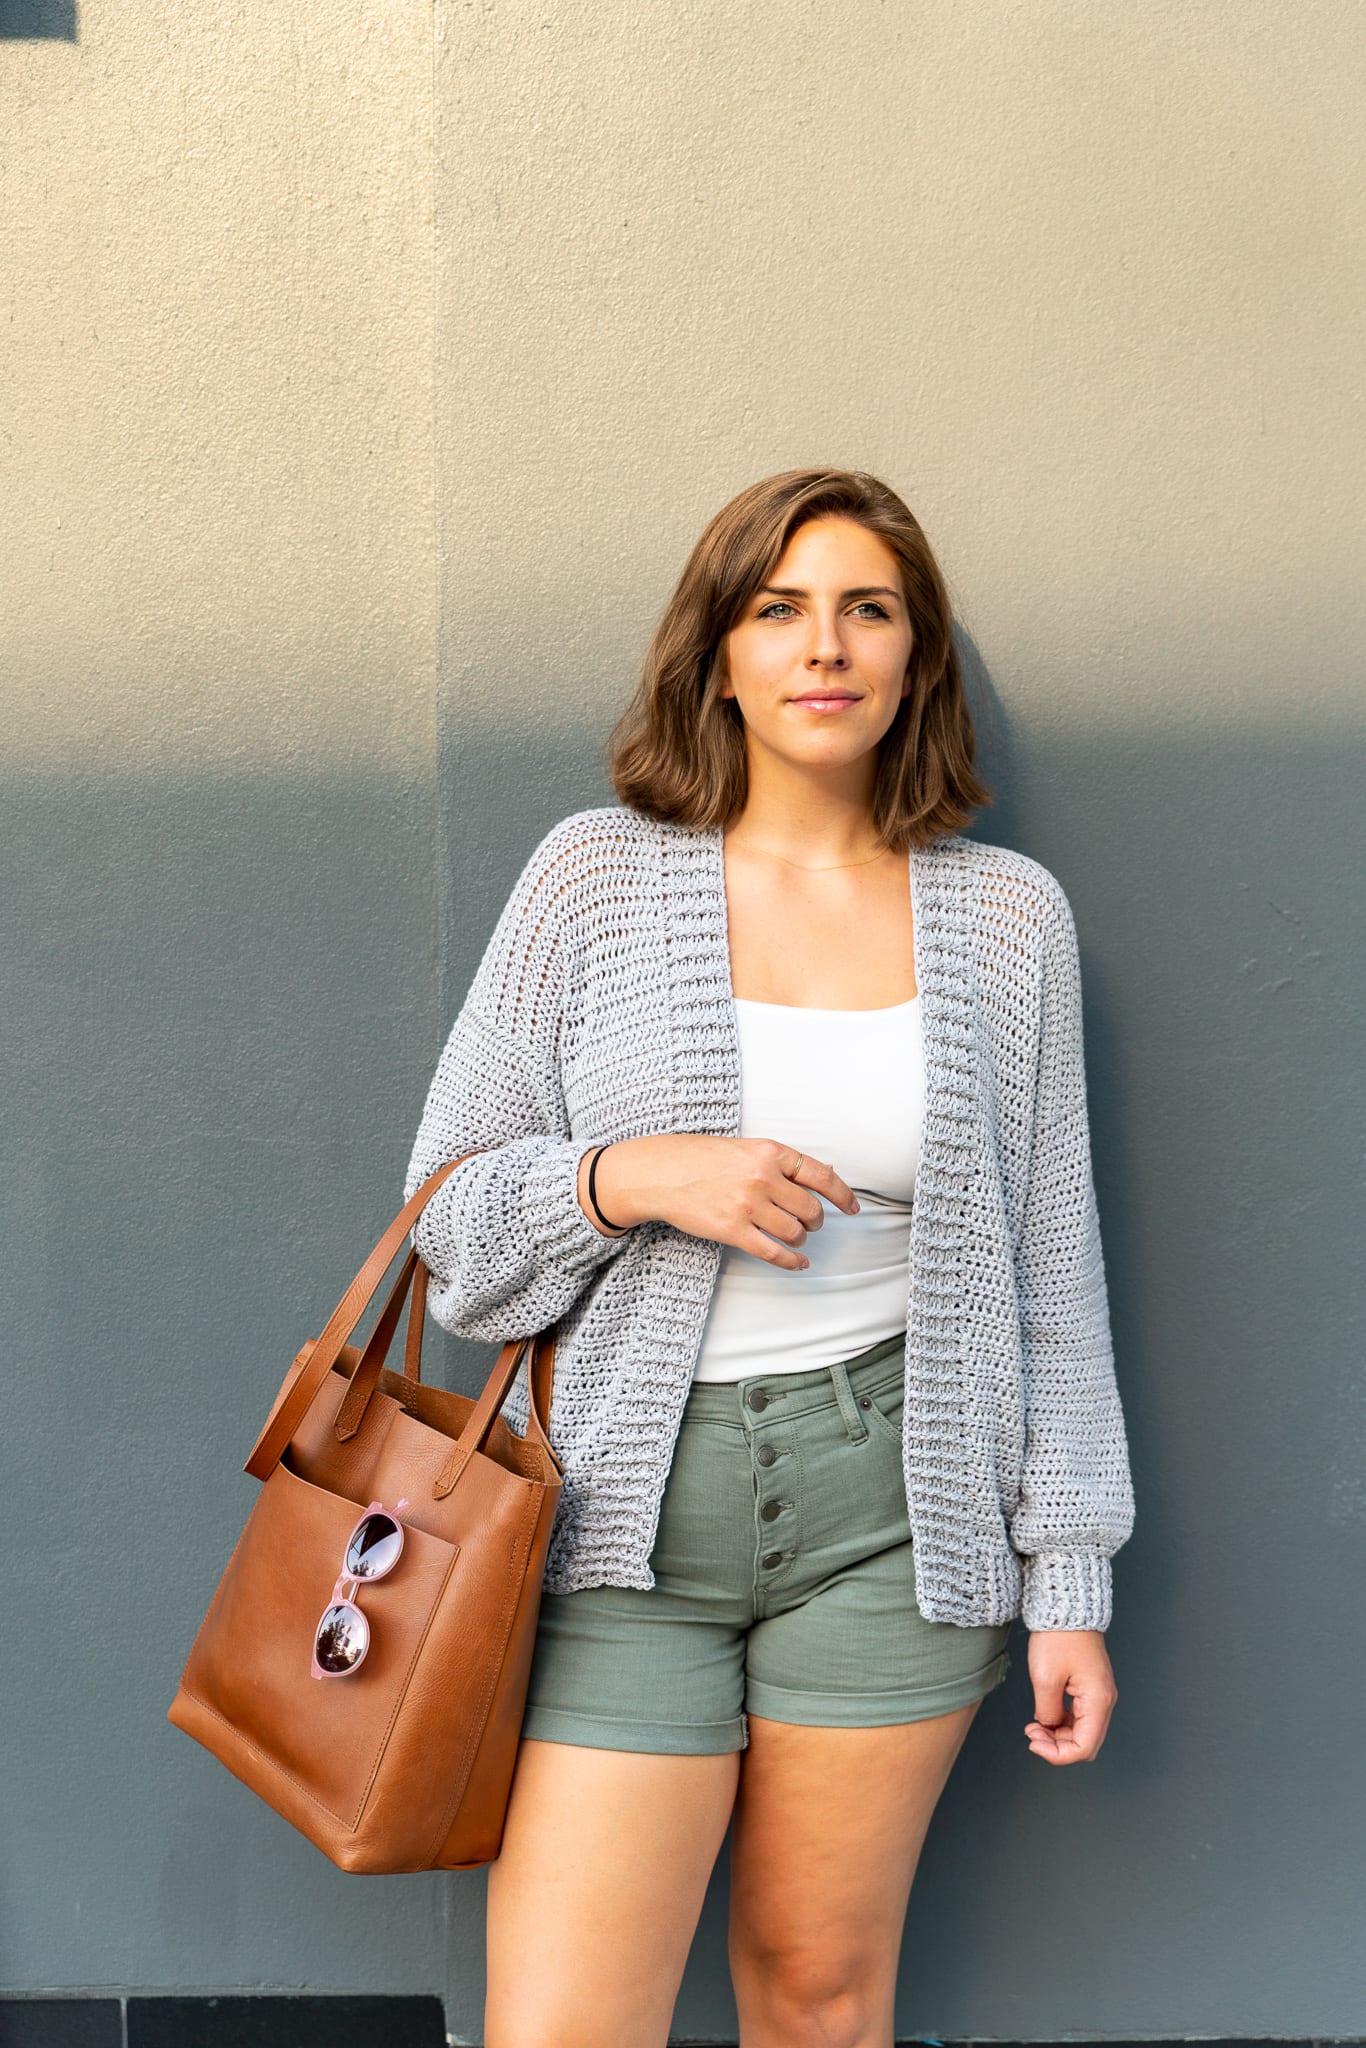
July 4th has passed, so of course I’ve already got fall on my mind with my Crochet Everyday Cotton Cardigan – a free pattern here on the blog!
Read through my inspiration, design process, and lots of info on the perfect yarn I chose, or scroll on down for the free pattern.

The Inspiration + Design
Almost two years ago I released one of my most popular patterns of all time – my Crochet Everyday Cardigan. With simple rectangle construction and thick ribbed edging, it has been a smash hit ever since.
I knew I needed a summer version made with a cotton yarn but I wanted to change up the sleeves!
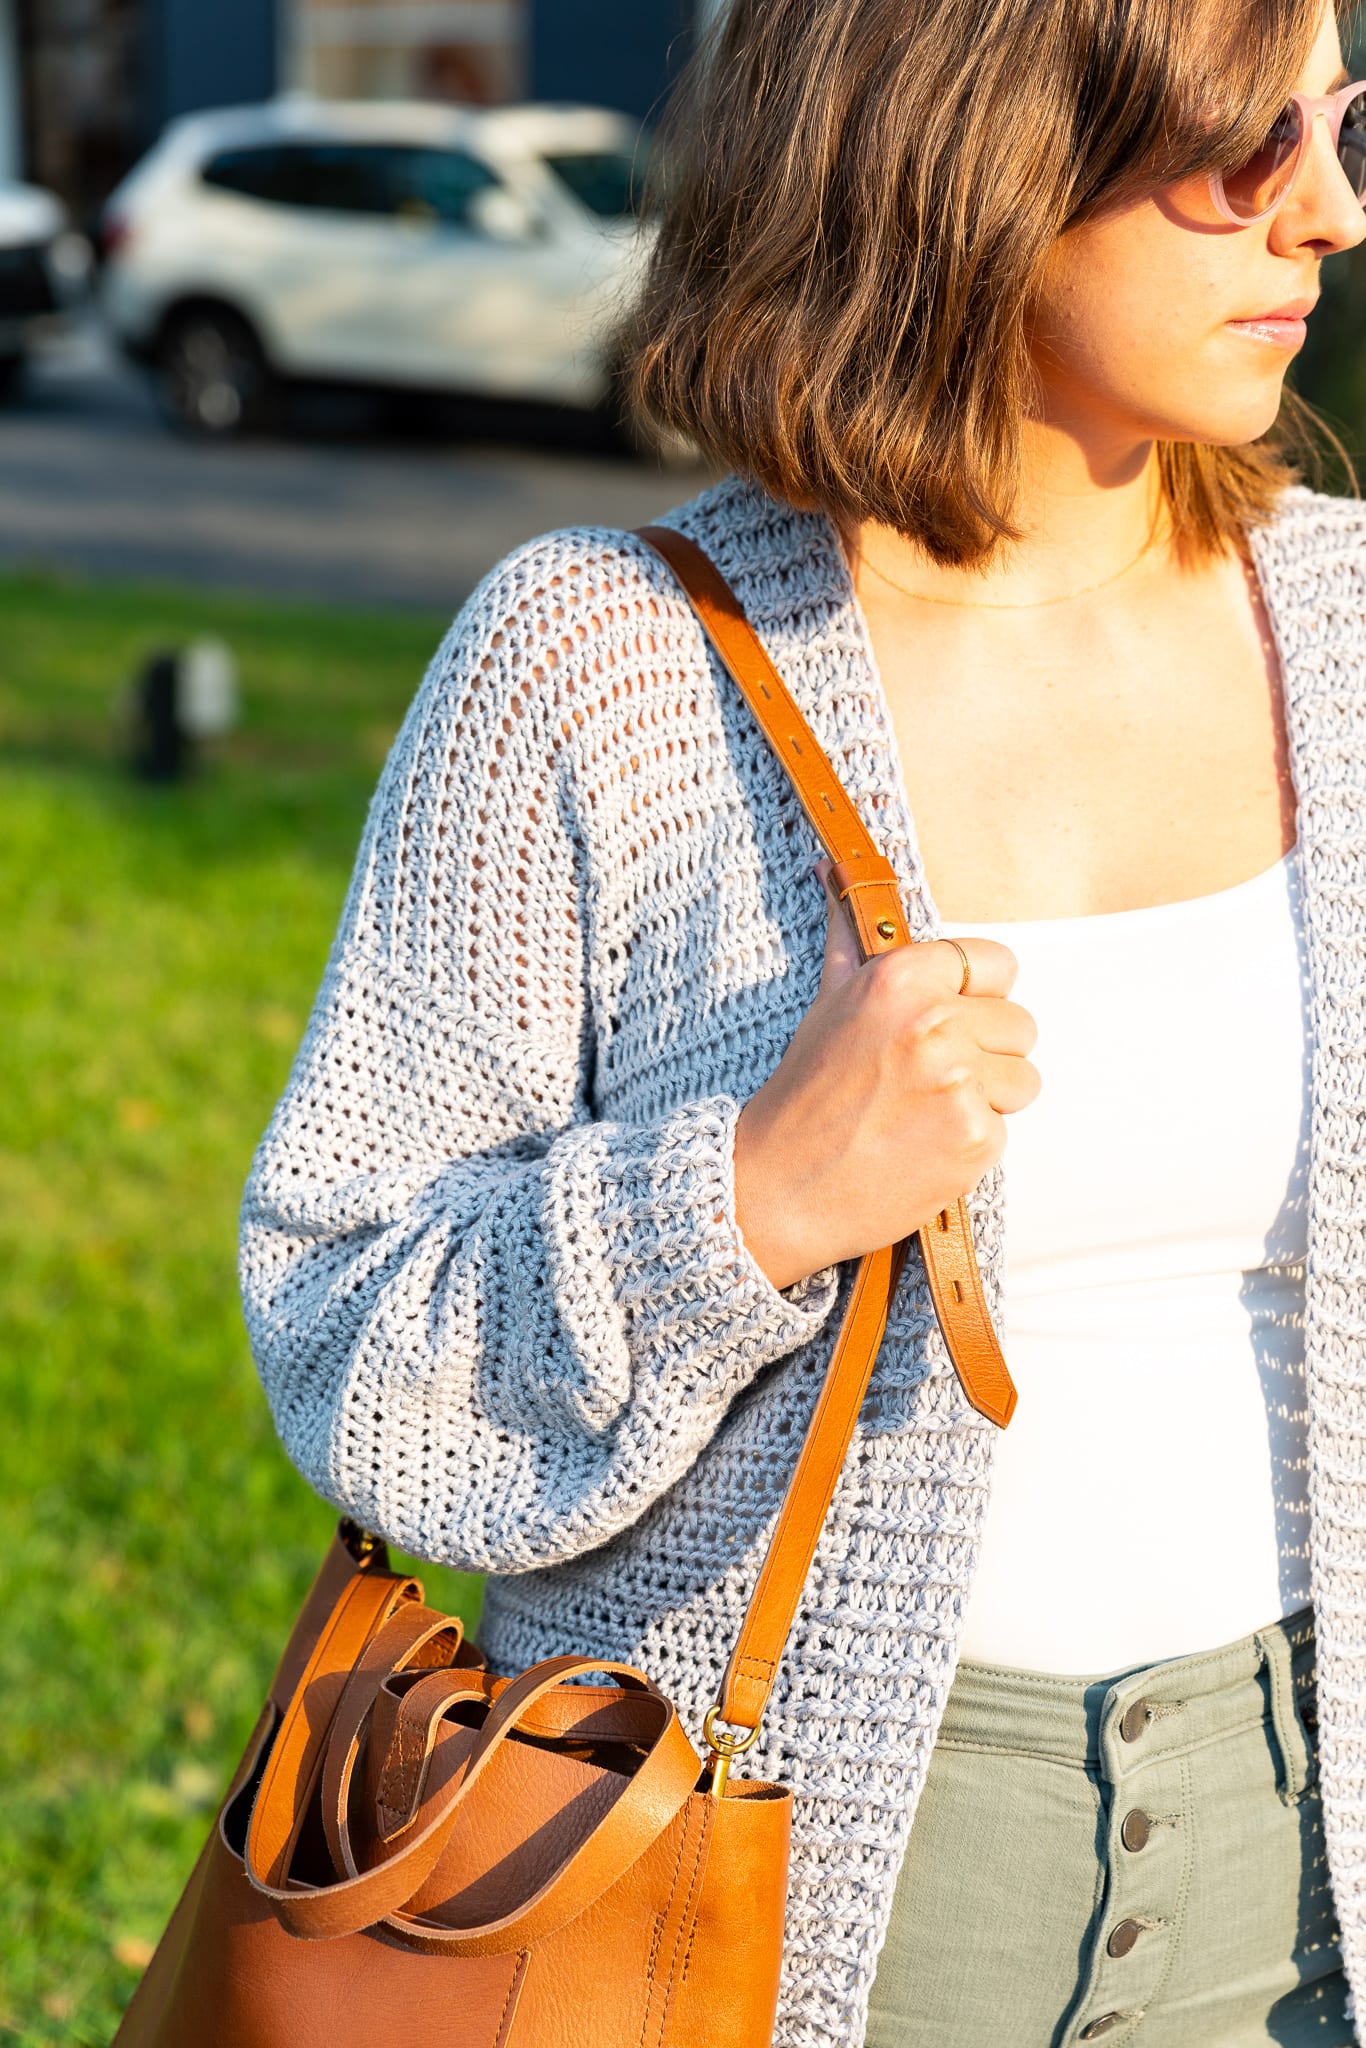
A loosely fitted balloon sleeve is so on trend right now and for good reason – they’re ultra comfortable and stylish. I love this sleeve style because they’re actually a lot easier to make than a fitted sleeve!
The whole thing came together and I think I’ll be wearing the Everyday Cotton Cardigan everywhere this summer and beyond.

The Yarn + Kit
I chose to use Lion Brand Yarn’s gorgeous Coboo cotton bamboo blend yarn. It’s soft, silky, comes in beautiful colors and is one of the most comfortable cottons to wear!
They actually came out with some new colors in this yarn since this sweater sample was finished and I have my eye on that Mauve – it’s so pretty!
The kit for this pattern is coming soon but if you can’t wait, just grab the number of Coboo cakes you need for your size via the free pattern below.


PATTERN
- Get the ad-free, large print, printable PDF pattern HERE.
- Grab the Ultimate Pattern Bundle that includes 150+ patterns just like this one on sale for $20 today HERE.
- PIN this pattern to your Pinterest boards for later HERE.
- Add this pattern to your Ravelry queue HERE.
Description: Crochet this simple cardigan with the most basic stitches and comfortable drape. Coboo yarn is light and breezy in the summer and this sweater will be the one you grab all season long!
Materials:
–Lion Brand Coboo Yarn (Weight 3/Light, 3.5 oz, 232 yds/212 m)
5 (6, 6, 7, 8, 8, 9) balls in Silver
1060 (1190, 1350, 1480, 1660, 1810, 2000) yds
970 (1090, 1240, 1360, 1520, 1660, 1830) m
Shop all of my favorite tools & materials HERE!
Sizes:
XS, S, M, L, XL, 2XL, 3XL
Gauge:
14 sts x 11 rows in Hdc = 4”
Finished Sweater Measurements:
| XS | S | M | L | XL | 2XL | 3XL | |
| Bust | 30 | 34 | 38 | 42 | 46 | 50 | 54 |
| Length | 20 | 20 | 21 | 21 | 22 | 22 | 23 |
| Armhole | 8 | 8.5 | 9 | 9.5 | 10 | 10.5 | 11 |
| Sleeve length | 16.5 | 17 | 17 | 17.5 | 17.5 | 18 | 18 |
Pattern Notes
-Sweater is shown in size M, model is 5’5” tall and true bust measures 38” for reference.
-Sweater is made to fit oversized and comfy, due to the very drapey, stretchy nature of the yarn – choose your normal t-shirt size for best fit.
-Sizing listed in the pattern will be in XS (S, M, L, XL, 2XL, 3XL).
-All pattern instructions will be listed for different sizes in ( ). All final stitch counts will be listed in < >.
-Pattern is worked from the back panel bottom up to the first front panel without breaking yarn. Rejoin yarn and work second front panel. Crochet sleeves independently, seam to armhole, then seam sleeves and sides at the same time. Hemline ribbing will be worked back and forth in rows, finished off and then neckline ribbing will be worked last.

Crochet Everyday Cotton Cardigan
Back Panel
Ch 56 (62, 68, 76, 82, 90, 96), sk 2 sts
Row 1: Hdc in 3rd ch from hook and across, t <54, 60, 66, 74, 80, 88, 94>
Row 2: Ch 2 (does not count as a st throughout), hdc across, t
Rpt row 2 until your panel measures 20 (20, 21, 21, 22, 22, 23)” or 56 (56, 58, 58, 60, 60) total rows.
Continue to First Front Panel without breaking yarn on a RS row.
First Front Panel
Row 1: Ch 2, hdc next 23 (26, 29, 33, 36, 40, 43) sts, t <23, 26, 29, 33, 36, 40, 43>
Row 2: Ch 2, hdc across, t
Rpt Row 2 until your panel measures 20 (20, 21, 21, 22, 22, 23)” or 56 (56, 58, 58, 60, 60) total rows.
Finish off, weave ends.
Second Front Panel
With RS facing, leave 8 sts unworked beyond last st of “First Front Panel” Row 1, join yarn to next st
Row 1: Ch 2, hdc next 23 (26, 29, 33, 36, 40, 43) sts, t <23, 26, 29, 33, 36, 40, 43>
Row 2: Ch 2, hdc across, t
Rpt Row 2 until your panel measures 20 (20, 21, 21, 22, 22, 23)” or 56 (56, 58, 58, 60, 60) total rows.
Finish off, weave ends.

Sleeves
*make 2
Ch 30 (32, 34, 36, 38, 40, 42)
Row 1: Dc in 3rd ch from hook and across, t <28, 30, 32, 34, 36, 38, 40>
Row 2: Ch 2, Dc, *Bpdc, Fpdc, rep from * in each st, Dc in last st, t
Row 3: Ch 2, Dc, *Fpdc, Bpdc, rep from * in each st, Dc in last st, t
Rows 4-7: Rep Rows 2 – 3
Row 8: Ch 2, *hdc inc, hdc; rep from * across, t <42, 45, 48, 51, 54, 57, 60>
Row 9: Ch 2, *hdc inc, hdc 2; rep from * across, t <56, 60, 64, 68, 72, 76, 80>
Row 10: Ch 2, hdc across, t
Rep row 10 until your sleeve panel measures 16.5 (17, 17, 17.5, 17.5, 18, 18)” or 46 (48, 48, 50, 50, 52, 52)
Finish off, weave ends

Assembly
Lie body panel out flat with RS facing up. Lie sleeve panel flat with RS facing up. At the same time, line up center st of last row of sleeve with shoulder point of front panel (where back panel end and front begins). Make sure your sleeve is centered.
Whip stitch in place along last row of sleeve and selvedge edge of body.
Rpt on second sleeve.
Fold body panel whereas front panels lie on top of back panel with WS together. Fold sleeve lengthwise (hot dog style). Your sweater should be starting to look like a sweater!
Whip stitch sleeve and side seam in one fluid seam beginning with sleeve ribbing and finishing at body hemline.
Rpt on other side.
Weave all ends.
Hemline Ribbing
*Note: When working all ribbing, stitch count does not matter as much as working evenly does. Take care to distribute sts evenly along – too many sts and your work will ruffle, too few sts and your work will gather.
Join yarn to the last row of your front panel (if you are looking at the cardigan, not wearing it, this will be the corner on the right panel [or left panel if you’re left handed]), Ch 2, Dc in each st around the entire hemline of the cardigan (working over the first front panel, over the side seam, across the back panel [you’re working into the original foundation chain here], over the second side seam, and across the other front panel), t
Row 2: Ch 2, Dc, *Bpdc, Fpdc, rep from * in each st, Dc in last st, t
Row 3: Ch 2, Dc, *Fpdc, Bpdc, rep from * in each st, Dc in last st, t
Rows 4-7: Rep Rows 2 – 3
Row 8: Sl st loosely in each st, Ch 2, turn your cardigan to work down the selvedge edge of your neckline, do not break yarn.
Neckline Ribbing
Dc evenly in each st around entire neckline (working 1 Dc into each of 8 skipped sts between front panels) until you reach other side of ribbing, t
Row 2: Ch 2, Dc, *Bpdc, Fpdc, rep from * in each st, Dc in last st, t
Row 3: Ch 2, Dc, *Fpdc, Bpdc, rep from * in each st, Dc in last st, t
Rows 4-7: Rep Rows 2 – 3
Finish off, weave all ends.

Abbreviations (US Terms):
Bpdc – back post double crochet
Ch – chain
Dc – double crochet
Fpdc – front post double crochet
Hdc – half double crochet
Inc – increase
Rep – repeat
RS– right side
Sl st – slip stitch
St(s) – stitch(es)
T – turn
WS – wrong side
OTHER FREE CROCHET SWEATER PATTERNS YOU MIGHT LOVE

1. Crochet Everyday Cardigan / 2. Crochet Bubblegum Pullover Sweater / 3. Crochet Slouchy Stripe Cardigan
Luv it !
You know I luv luv luv your sweater patterns
Shoot – ALL your patterns
Very talented
I will be making this for sure 🙂
Thank you !!!!
Hey Ashleigh,
I took advantage of Lionbrand sitewide40 sale and ordered two of your kits. They are both ponchos, so excited to get your stuff. Thanks for being YOU.
Deanna
Love this sweater and all your designs! Thanks for working so hard!
I love Lion Brand rewind yarn – making a Summer tote bag with it now. Looking forward to starting this cardigan. Thanks for sharing the free pattern!
Much appreciated,
Frances
Hi Ashleigh,
Thank you so much for this beautiful pattern. You are very talented.
I’ve added it to my long list of must-make patterns 🙂
I am excited to make this sweater with the Lion brand yarn.
Kendra
I will try to make crochet everyday cardigan. Looks beautiful????
But.. it’s the 1st time for me to make cardigan. Hopefully i can finish it ????
Thank you for your free pattern..
Your amazing crocheter ,I would never had thought I could crochet a sweater but you proved me wrong,I made the one that looks like this and made one for my friend for winter thank you