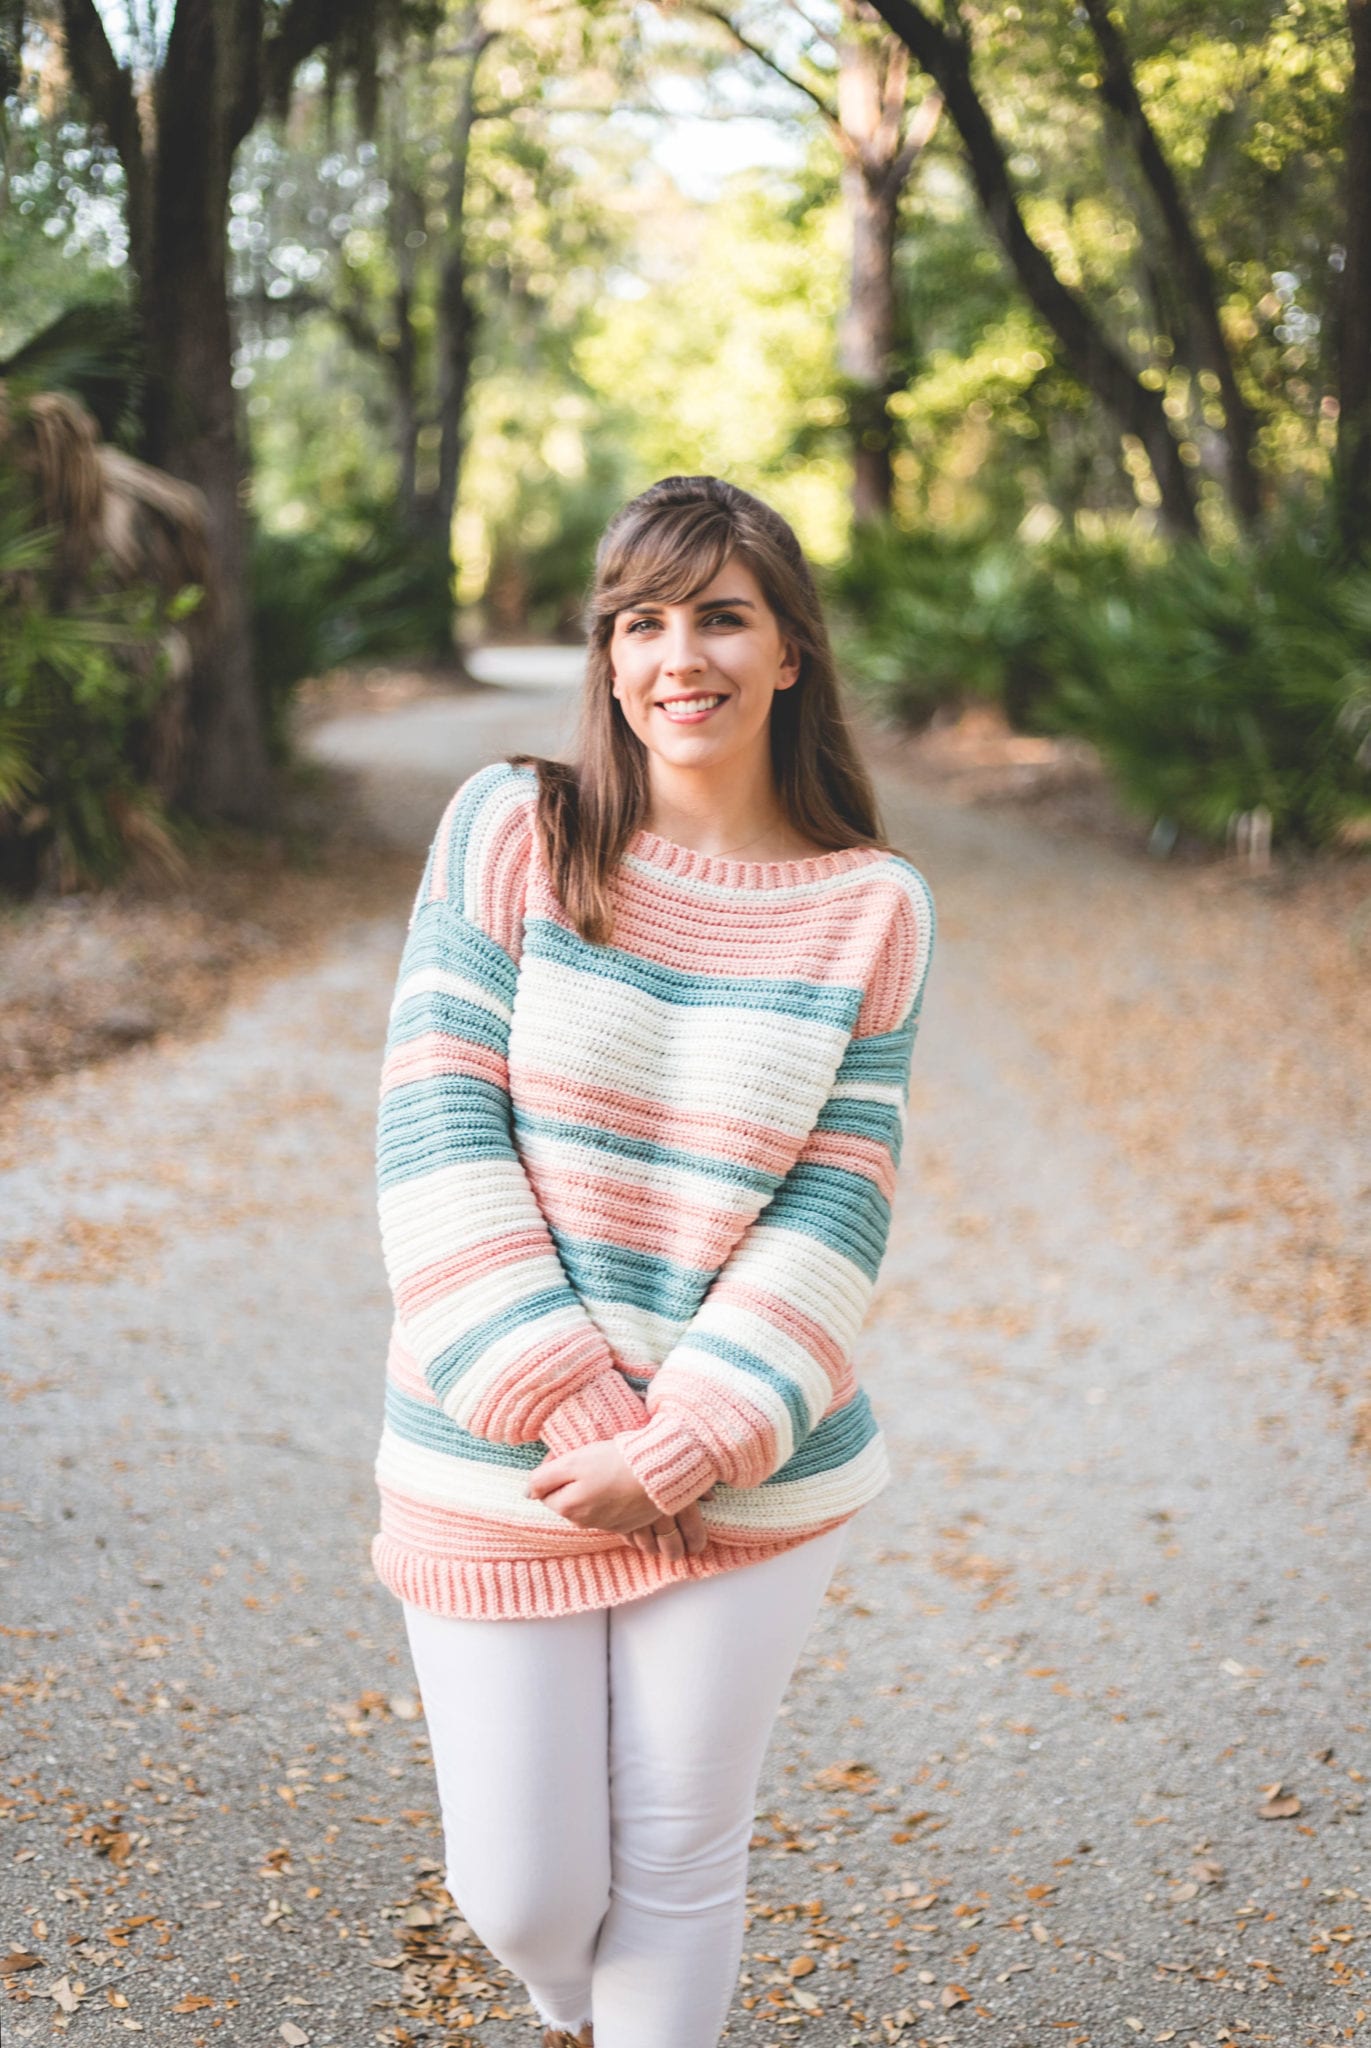
A sweater worth loving – my Crochet Magic Stripe Sweater – is a free pattern here on the blog!
Read through my inspiration, design process, and lots of info on the perfect yarn I chose, or scroll on down for the free pattern.
The Inspiration + Design
When I set out to design this pattern I knew I wanted a sweater that was simple and comfortable – something cozy for the chilly spring/summer nights ahead!
Although this sweater looks chunky and warm, it’s actually incredibly lightweight and breezy due to the thin yarn I used. Tiny yarns take a long time to work up but they create the most gorgeous effect in a finished piece and they’re necessary for summer projects!
I chose to do some random striping with pink and aqua yarns and didn’t quite know how to lay them out. So I found a “stripe generator” online to help! You enter the number of rows you’ll be working for your chosen size/fit and the colors you’re working with and you can create stripe patterns with the click of a button! So neat, it’s like magic! Check that out HERE.
The Yarn
This sweater design uses a new yarn from Lion Brand called Beautiful You – it’s a category 2 weight acrylic yarn that has a very tight twist to it for great stitch definition and beautiful drape! The acrylic is really soft against the skin and this line comes in some gorgeous color options – that’s part of the reason why I wanted to create a truly customizable design!
You can work with one solid color and follow this pattern, work with 2 colors evenly striped, 3 or more colors randomly striped – you could even create a pretty rainbow of stripes! It’s all up to you and your personal style.
Even though this project is super unique to you, Lion Brand has created a kit in the blue/pink color option you see pictured as well as a silver/black option for the neutral lovers. Grab the kit here that comes with a printed copy of the pattern.
If you’re customizing and choosing your own palette, pick up a la carte Beautiful You yarn you need here!

PATTERN
- Get the ad-free, large print, printable PDF pattern HERE.
- Grab the Ultimate Pattern Bundle that includes 150+ patterns just like this one on sale for $20 today HERE.
- PIN this pattern to your Pinterest boards for later HERE.
- Add this pattern to your Ravelry queue HERE.
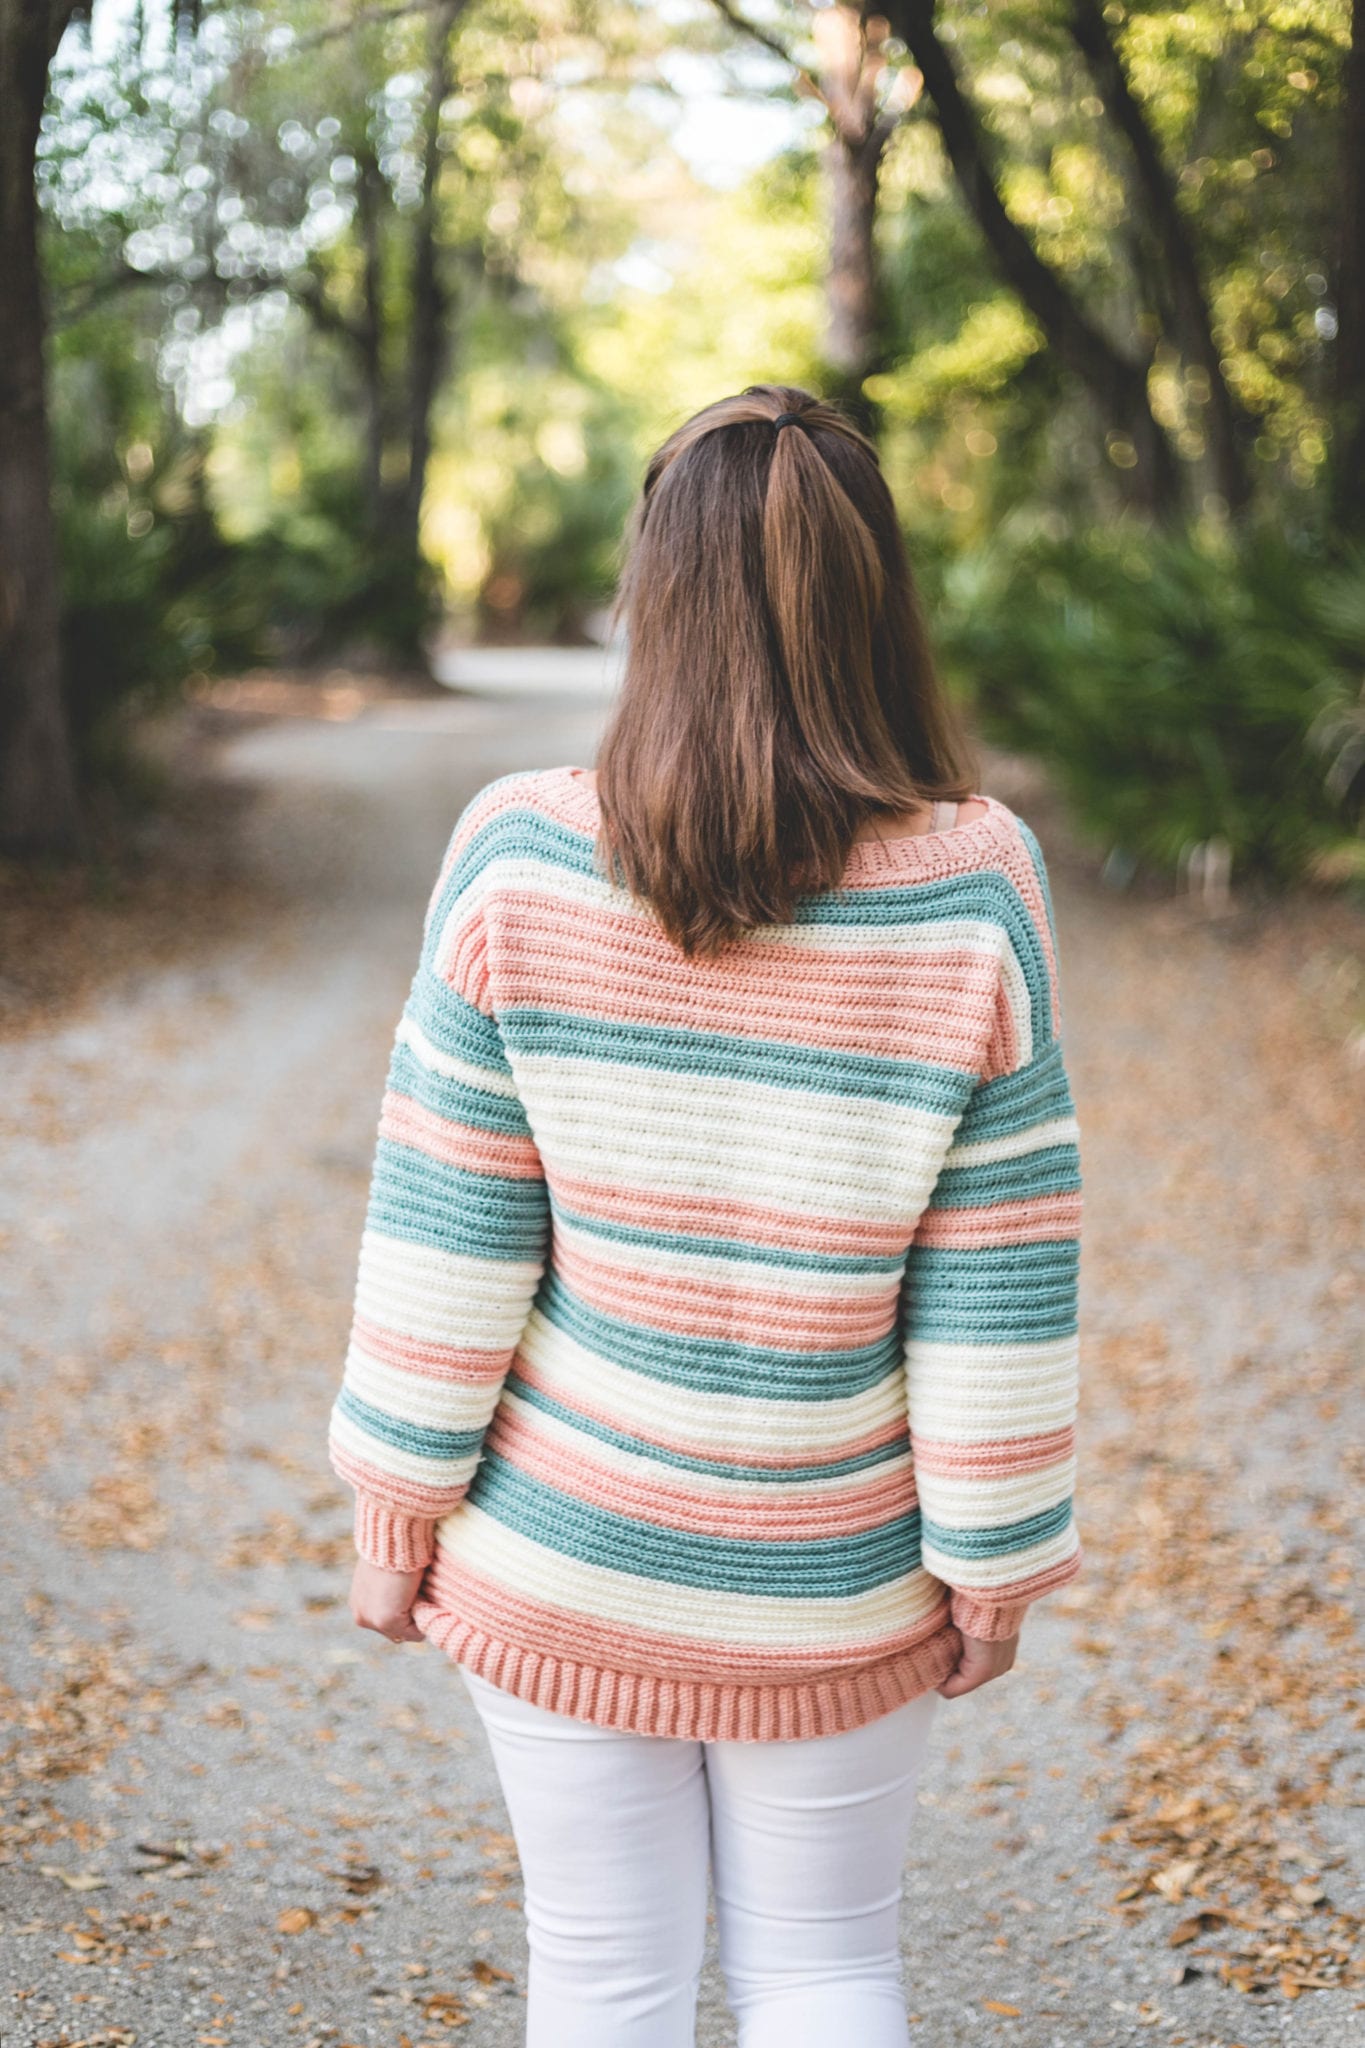
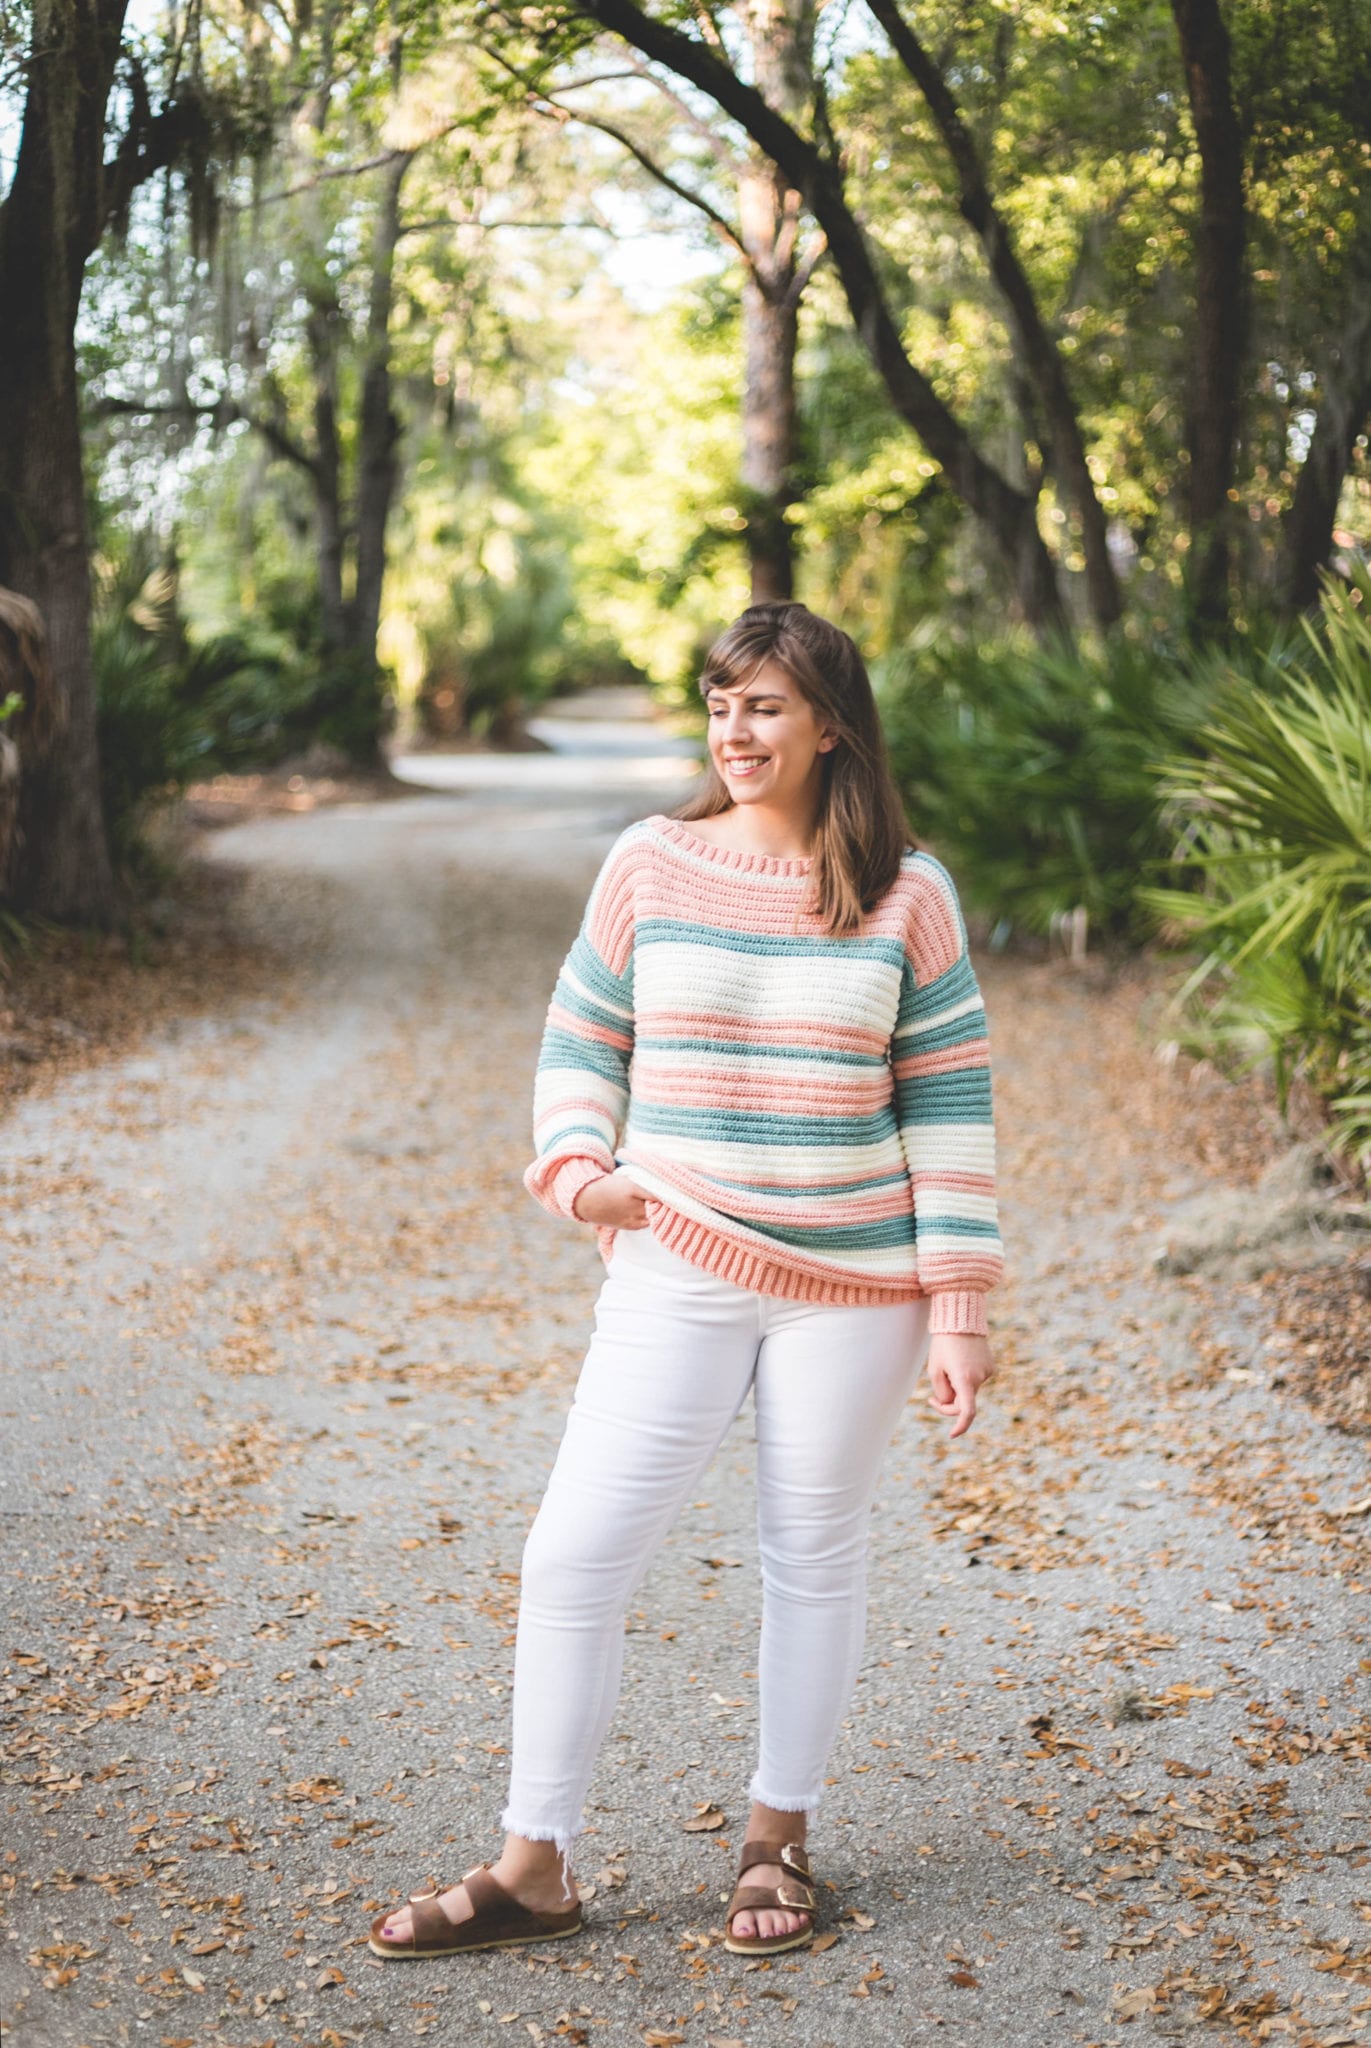
To sum it up: The Magic Stripe Sweater is extra slouchy, comfortable, and relaxed with beautiful drape due to Beautiful You yarn. Elongated length covers the tush in a flattering way – making this the perfect elevated, handmade loungewear to layer with leggings. You can also alter the body to make the perfect hip-length sweater that’s equally comfy. Play with a random stripe generator (it’s like magic!) to create your own unique stripe pattern or follow my detailed guide within. This project is made to create your perfect stripe sweater that’s tailor made to fit your taste.
Materials:
–Lion Brand Beautiful You yarn (Weight: 2/Fine – 3.5oz, 326 yds)
Spanish Villa (Color A) – 3 (3, 3, 3, 4, 4, 4) skeins
Aquatica (Color B) – 3 (3, 3, 3, 4, 4, 4) skeins
Sugar Swizzle (Color C) – 3 (3, 3, 3, 4, 4, 4) skeins
Click here to grab the yarn kit from Lion Brand in 2 color options!
OR 6 (7, 8, 9, 10, 10, 11) skeins of any color to make a solid colored sweater
Shop all of my favorite tools & materials HERE!
Sizes:
XS, S, M, L, XL, 2XL, 3XL
Gauge:
22 sts x 16 rows in BLO Hdc = 4″
Finished Sweater Measurements:
Bust: 34 (38, 42, 46, 50, 54, 58)”
Length: 25 (25.5, 26, 26.5, 27, 27.5, 28)”
Sleeve (to underarm): 16 (16.5, 16.5, 17, 17, 17.5, 17.5)”
Armhole: 6.5 (7, 7.5, 8, 8.5, 9, 9.5)”
Abbreviations (US terms):
Blo – back loop only
ch – chain
hdc – half double crochet
sk – skip
t – turn
st(s) – stitch(es)
rep – repeat
RS – right side
WS – wrong side
Skill Level:
Level 2 – Easy
Pattern Notes
-Sweater is shown in size M, model is 5’5” tall and true bust measures 38” for reference.
-Sweater is intended to have lots of room and slouchy fit. If you are between sizes, size up for an even more oversized fit or size down for a slightly slimmer fit.
-Sizing listed in the pattern will be in XS, Small, Medium, Large, XL, 2XL, and 3XL listed in parenthesis such as 95 (106, 117, 128, 139, 150, 161)) whereas 95 for size XS, 106 for size S, 117 for size M, 128 for size L, 139 for size XL, 150 for size 2XL and 161 for size 3XL. When only one number is given, it applies to all sizes. To follow pattern more easily, print the pattern and circle/highlight all numbers pertaining to your size before beginning.
-Pattern is worked in flat panels from the bottom up – 2 front and back panels & 2 identical sleeve panels that are all seamed together at the end before working the collar neckline. Hemline ribbing and sleeve ribbing is sewn on pre-assembly.
-Body colorwork requires changing color every few rows. I suggest carrying your yarn up the side of your work loosely to maintain good tension and reduce the number of ends you must weave later. When changing color, always join new color before Ch 2 and turn of following Row.
-I used www.RandomStripes.com to map out the random stripe pattern of my sweater. You can follow my stripe instructions below to make a sweater that looks just like mine or play with your own stripe design.
-You may not need all 3 skeins of each color included in your kit for this pattern. However I’ve set up the kit to have equal amounts of yarn in each color so that you may decide on your own stripe pattern and have plenty of yarn. Use your extras for other projects or start on another sweater!
-In this pattern, Color A is Spanish Villa, Color B is Aquatica, Color C is Sugar Swizzle.
-Anytime the pattern indicates you work a row of BLO Hdc I recommend making the last stitch of that row a regular Hdc through both loops. This will keep your edges more solid and easier to sew later.
-All pattern instructions will be listed for different sizes in ( ). All final stitch counts will be listed in < >.
Crochet Magic Stripe Sweater
Front Panel
Body:
With Color A, Ch 95 (106, 117, 128, 139, 150, 161)
Row 1: Hdc in the 3rd st from hook and in each across <93, 104, 115, 126, 137, 148, 159>
Row 2: Ch 2, t, BLO Hdc in each st across <93, 104, 115, 126, 137, 148, 159>
Rep Row 2 following stripe guide below until you’ve finished 82 rows
Stripe Guide:
*This guide begins with Row 1 of the body that you’ve already made with Color A
8 Rows: Color A
8 Rows: Color C
8 Rows: Color B
6 Rows: Color A
2 Rows: Color C
2 Rows: Color B
2 Rows: Color A
6 Rows: Color C
6 Rows: Color B
4 Rows: Color A
2 Rows: Color C
2 Rows: Color B
4 Rows: Color A
8 Rows: Color C
4 Rows: Color B
8 Rows: Color A
2 (4, 6, 8, 10, 10, 10) Rows: Color C
Sizes 2XL-3XL only: (2, 4) Rows: Color A
Shoulder Shaping:
Change to Color B
Row 1: Ch 2, t, BLO Hdc next 30 sts (30)
Row 2: t, Sk 1 st, BLO Hdc next 29 sts to end (29)
Row 3: Ch 2, t, BLO Hdc next 28 sts (28)
Row 4: t, Sk 1 st, BLO Hdc next 27 sts (27)
Change to Color A
Row 5: Ch 2, t, BLO Hdc next 26 sts (26)
Row 6: t, Sk 1 st, BLO Hdc next 25 sts (25)
Finish off, weave ends.
Continuing from where you worked your 30th st from Row 1 of Shoulder Shaping, sk 55 sts
Join Color B yarn to next st, pull up loosely on loop (do not chain)
Row 1: BLO Hdc in same st as join and in each across to end (30)
Row 2: Ch 2, t, BLO Hdc next 29 sts (29)
Row 3: t, Sk 1 st, BLO Hdc next 28 sts (28)
Row 4: Ch 2, t, BLO Hdc next 27 sts (27)
Change to Color A
Row 5: t, Sk 1 st, BLO Hdc next 26 sts (26)
Row 6: Ch 2, t, BLO Hdc next 25 sts (25)
Finish off, weave ends.
Back Panel:
Rep front panel pattern to end of 90 Rows and stripe guide.
Continue:
4 Rows: Color B
2 Rows: Color A
Finish off, weave ends.
Hemline Ribbing:
With Color A, Ch 14
Row 1: Hdc in the 3rd st from hook and in each across <12>
Row 2: Ch 2, t, BLO Hdc in each st across <12>
Rep Row 2 until your piece measures 17 (19, 21, 23, 25, 27, 29)” or 68 (76, 84, 92, 100, 108, 116) rows
Finish off, leaving one long tail for sewing.
With a whip stitch, sew selvedge edge of ribbing to foundation stitches of Front Panel.
Repeat Hemline Ribbing and sew to Back Panel.
Sleeves:
*make 2
With Color A, Ch 36 (38, 40, 42, 44, 46, 48)
Row 1: Hdc in the 3rd st from hook and in each across <34, 36, 38, 40, 42, 44, 46>
Row 2: Ch 2, t, *2 BLO Hdc, BLO Hdc; Rep from * across <51, 54, 57, 60, 63, 66, 69>
Row 3: Ch 2, t, BLO Hdc in each st across <51, 54, 57, 60, 63, 66, 69>
Row 4: Ch 2, t, *2 BLO Hdc, BLO Hdc next 2; Rep from * across <68, 72, 76, 80, 84, 88, 92>
Change to Color C
Row 5: Ch 2, t, BLO Hdc in each st across <68, 72, 76, 80, 84, 88, 92>
Rep Row 5 following stripe guide below until you’ve finished 61 (63, 63, 65, 65, 67, 67) total rows
Stripe Guide:
*This guide begins with Row 1 of the sleeve that you’ve already made with Color A
4 Rows: Color A
1 Row: Color C
4 Rows: Color A
4 Rows: Color C
4 Rows: Color B
6 Rows: Color C
4 Rows: Color A
10 Rows: Color C
10 Rows: Color B
4 Rows: Color A
4 Rows: Color B
2 Rows: Color C
4 (6, 6, 8, 8, 6, 6) Rows: Color B
Sizes 2XL-3XL only 2 Rows: Color A
Finish off, weave ends.
Sleeve Ribbing:
*make 2
With Color A, Ch 14
Row 1: Hdc in the 3rd st from hook and in each across <12>
Row 2: Ch 2, t, BLO Hdc in each st across <12>
Rep Row 2 until your piece measures 6 (6.5, 7, 7.25, 7.5, 8, 8.25)” or 25 (26, 28, 29, 30, 32, 33) rows
Finish off, leaving one long tail for sewing.
With a whip stitch, sew selvedge edge of ribbing to foundation stitches of Sleeve.
Make second sleeve and repeat sleeve ribbing.
Assembly:
We will sew our sweater together with Color B (or whatever color you have plenty of to do all your sewing. Your seams won’t show).
Lay your back panel out flat with the RS facing up.
Lay your front panel out flat on top of your back panel with the RS facing down.
You should now have RS facing together.
With a spare piece of yarn thread on a tapestry needle, whip stich each front panel shoulder to the back panel, lining up the outside edges.
Open up your body panels to lie flat, RS facing down.
Lay each sleeve out flat perpendicular to the shoulder seams with the RS facing down.
Line up the center st of the last row of your sleeve with the shoulder seam.
Optional: Use locking stitch markers to keep your sleeve in place along the selvedge edge of the body.
Whip stitch the last row of your sleeve piece along the edge of the body.
Repeat sleeve sewing on other side.
Fold sweater such that the WS is facing out, front panel on top of back panel, sleeves folded lengthwise (hot dog style) and the side seams of the body are lined up.
Whip stitch along selvedge edge of sleeve and body in one continuous seam from the sleeve ribbing down to the hemline ribbing.
Reinforce the underarm area by adding extra whip stitches where appropriate.
Tip: To avoid lots of obvious stitches along contrast color stripes, sew your whip stitches around the turning chains and final Hdc stitches themselves – not through the middles of stitches. This will make it easier to keep a consistent looking seam that’s less noticeable.
Repeat sewing along other side.
Turn your sweater RS out
Neckline Ribbing:
With Color A, Ch 8
Row 1: Hdc in the 3rd st from hook and in each across <6>
Row 2: Ch 2, t, BLO Hdc in each st across <6>
Rep Row 2 until your piece measures 16 (18, 20, 22,.5, 24.5, 26, 28)” or 64 (73, 80, 90, 97, 105, 112) rows
Finish off, leaving one long tail for sewing.
With a whip stitch, sew selvedge edge of ribbing to open edge of neckline evenly around.
Weave all ends and steam your sweater to block. Enjoy!
OTHER SPRING ESSENTIAL FREE CROCHET PATTERNS
1. Crochet Elle Convertible Shawl / 2. Crochet Rancher Poncho / 3. Crochet Audrey Tunic
Hi Ashleigh,
What is the name of the yarn?
Thanks
Vasanti
Hallo
I’m a bit confused. In the beginning, the pattern reads Rep Row 2 following stripe guide below until you’ve finished 82 rows. But if I count the rows in the stripe quite for 2xl to 3xl I get more than 82 rows.
Can you please give more clarification of this. I might just be miss reading the pattern.
Thank you
Marisa
Cute sweater pattern! Your posts are always wonderfully beginner-oriented while still captivating more advanced crafters as well. I’m 13 and I just launched my blog using your “Start a Blog” tutorials. Thank you so much for providing this information in a clear and relatable way!