↑

Sewrella

Handmade Home

  • kids
    • amigurumi + toys
    • baby blankets
    • kids accessories
  • Decor
    • blankets
    • pillows
    • kitchen
    • tabletop
    • wreaths
  • accessories
    • hats
    • scarves
    • shawls + wraps
    • bags
    • ponchos
  • sweaters
    • cardigans
    • pullovers
  • holiday
    • easter
    • halloween
    • thanksgiving
    • christmas
  • techniques
  • Sewrella Method

Baby Dory Inspired Crochet Hat

July 3, 2016 by Ashleigh

Click HERE for the $1.99 large print, ad-free, pdf Pattern!

If you haven’t rushed to your nearest theater to see Finding Dory yet, you need to! Stop reading right now. Rush to the theater.

I’ll wait.

Okay, now that we all know what an amazing movie it is (I venture to go as far as saying it’s as good as Finding Nemo!) let’s proceed with today’s project!

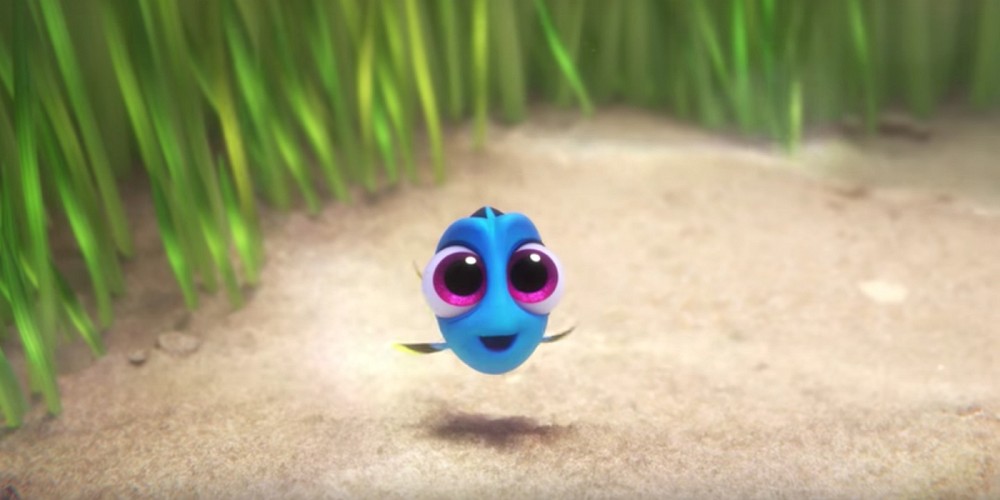
As Dory is the heroin of the movie, it makes sense that Pixar gave us a bit more background on her, and everyone is loving Baby Dory! She’s so small, cute, and cuddly even if a bit confused. But hey, that’s Dory.

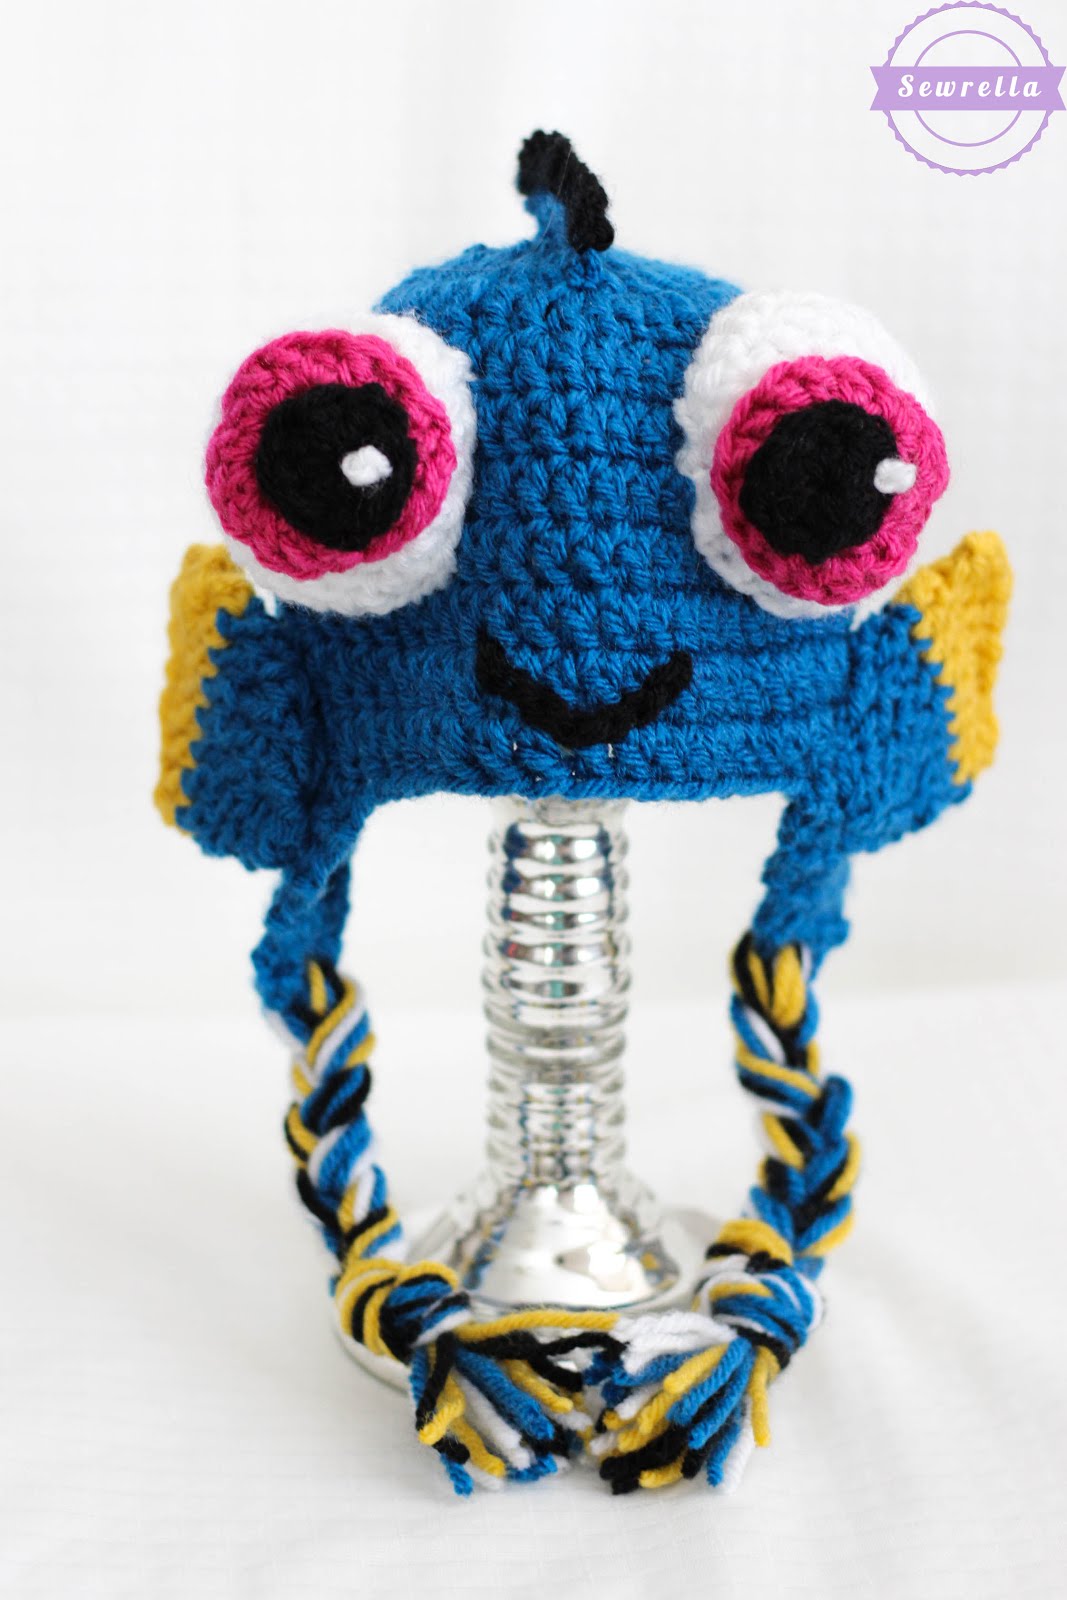
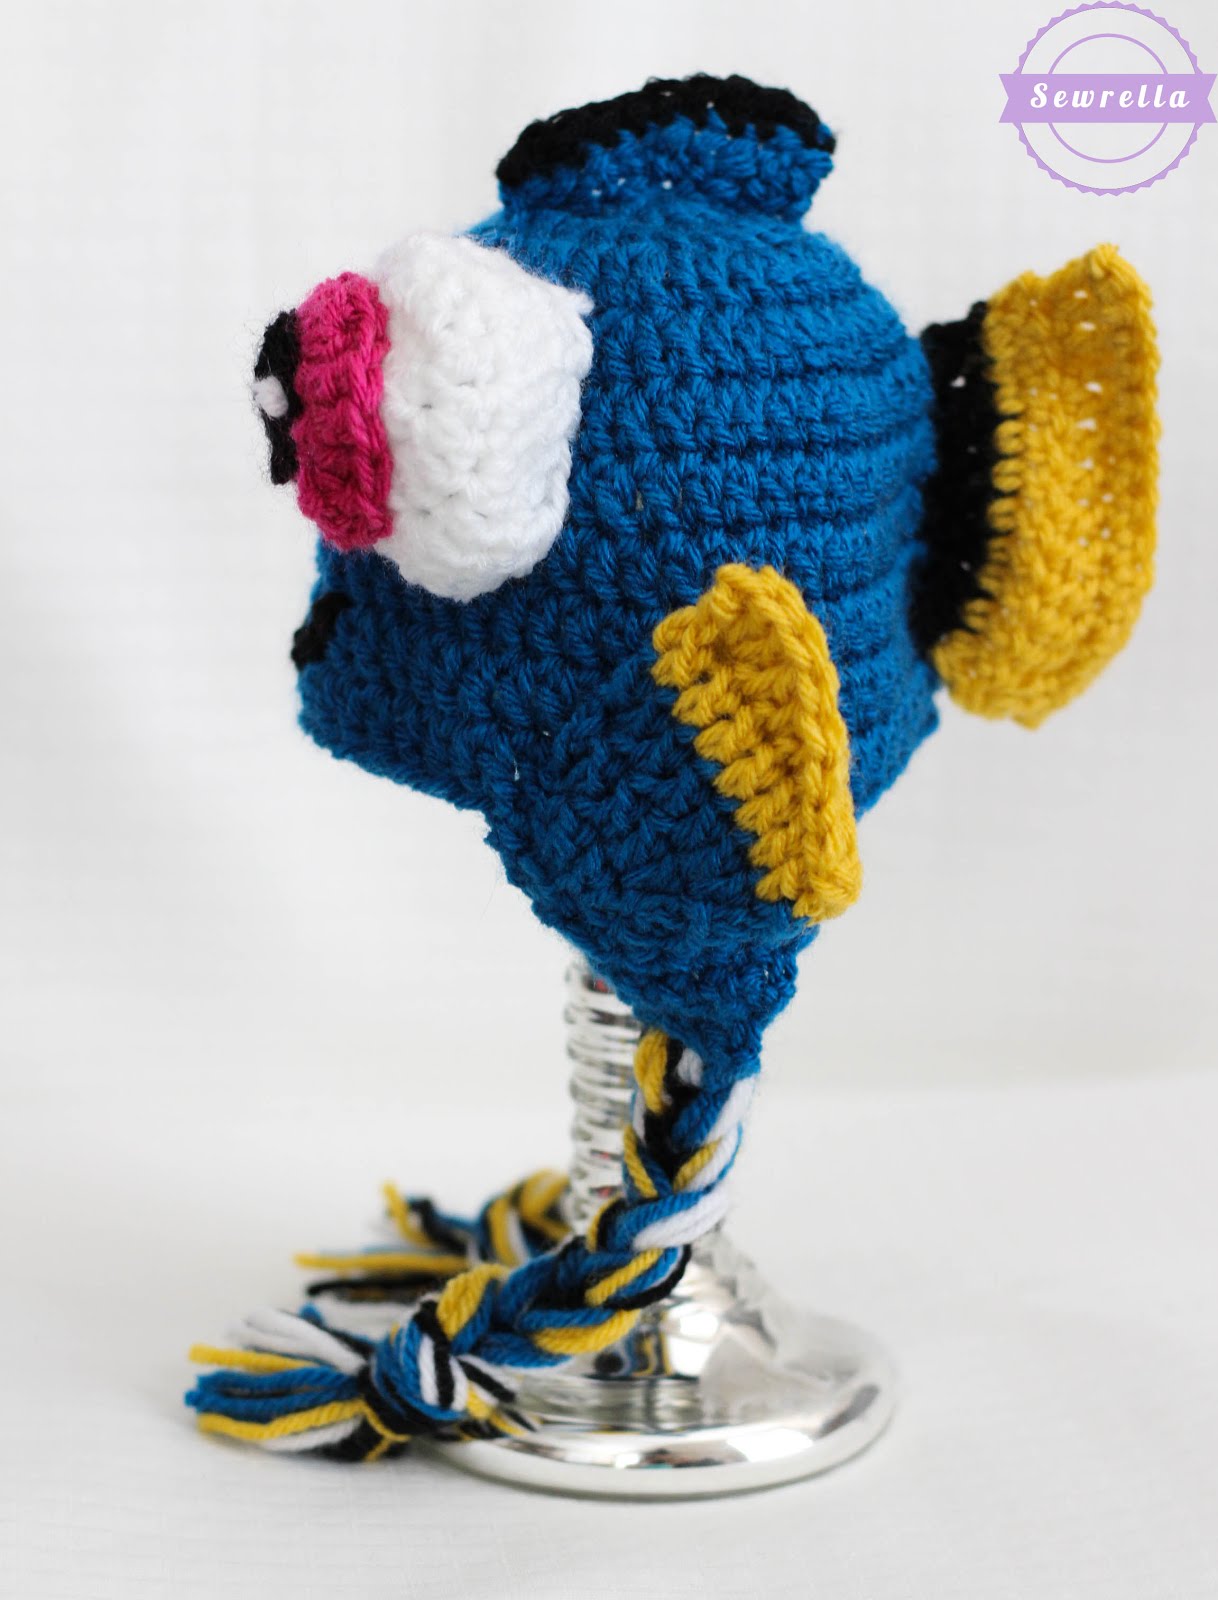
So I whipped up a Baby Dory hat for all the munchkins out there who want to look just like their favorite fish!

Make this adorable hat in any size below, then make and add the character embellishments.

OH – and just keep swimming!


PATTERN:

Materials:
-Worsted weight yarn, I used Lion Brand Vanna’s Choice in Sapphire, Mustard, White, Black, and Raspberry
-Size I 5.5mm crochet hook
-Tapestry needle

Hat:
*No matter the size, use Sapphire for the hat.
*After making the body of the hat, continue with earflap pattern below.

Newborn baby

Magic ring, 11 DC in magic ring, join to first DC, chain 2
Round 2: 2 DC in each around, join, chain 2 (22 DC)
Round 3: 2 DC in first, DC in next, repeat around, join, chain 2 (33 DC)
Round 4: 2 DC in first, DC in next 2, repeat around, join, chain 2 (44 DC)
Round 5-10: DC in each around, join, chain 2 (44 DC)
Round 11: SC in each around, join, finish off, weave in ends (44 SC)
3-6 Months
Magic ring, 11 DC in magic ring, join to first DC, chain 2
Round 2: 2 DC in each around, join, chain 2 (22 DC)
Round 3: 2 DC in first, DC in next, repeat around, join, chain 2 (33 DC)
Round 4: 2 DC in first, DC in next 2, repeat around, join, chain 2 (44 DC)
Round 5: 2 DC in first, DC in next 10, repeat around, join, chain 2 (48 DC)
Round 6-11: DC in each around, join, chain 2 (48 DC)
Round 12: SC in each around, join, finish off, weave in ends (48 SC)
6-9 Months
Magic ring, 11 DC in magic ring, join to first DC, chain 2

Round 2: 2 DC in each around, join, chain 2 (22 DC)
Round 3: 2 DC in first, DC in next, repeat around, join, chain 2 (33 DC)
Round 4: 2 DC in first, DC in next 2, repeat around, join, chain 2 (44 DC)


Round 5: 2 DC in first, DC in next 10, repeat around, join, chain 2 (48 DC)
Round 6: 2 DC in first, DC in next 11, join, chain 2 (52 DC)
Round 7: 2 DC in first, DC in next 12, join, chain 2 (56 DC)
Round 8-13: DC in each around, join, chain 2 (56 DC)
Round 14: SC in each around, join, finish off, weave in ends (56 SC)
9-12 Months
Magic ring, 11 DC in magic ring, join to first DC, chain 2

Round 2: 2 DC in each around, join, chain 2 (22 DC)
Round 3: 2 DC in first, DC in next, repeat around, join, chain 2 (33 DC)
Round 4: 2 DC in first, DC in next 2, repeat around, join, chain 2 (44 DC)
Round 5: 2 DC in first, DC in next 10, repeat around, join, chain 2 (48 DC)
Round 6: 2 DC in first, DC in next 11, join, chain 2 (52 DC)
Round 7: 2 DC in first, DC in next 12, join, chain 2 (56 DC)
Round 8-13: DC in each around, join, chain 2 (56 DC)
Round 14: SC in each around, join, finish off, weave in ends (56 SC)


Young Child
Magic ring, 11 DC in magic ring, join to first DC, chain 2
Round 2: 2 DC in each around, join, chain 2 (22 DC)
Round 3: 2 DC in first, DC in next, repeat around, join, chain 2 (33 DC)
Round 4: 2 DC in first, DC in next 2, repeat around, join, chain 2 (44 DC)

Round 5: 2 DC in first, DC in next 10, repeat around, join, chain 2 (48 DC)
Round 6: 2 DC in first, DC in next 11, join, chain 2 (52 DC)
Round 7: 2 DC in first, DC in next 12, join, chain 2 (56 DC)
Round 8: 2 DC in first, DC in next 13, join, chain 2 (60 DC)
Round 9-14: DC in each around, join, chain 2 (60 DC)
Round 15: SC in each around, join, finish off, weave in ends (60 SC)

Child 
Magic ring, 11 DC in magic ring, join to first DC, chain 2
Round 2: 2 DC in each around, join, chain 2 (22 DC)
Round 3: 2 DC in first, DC in next, repeat around, join, chain 2 (33 DC)
Round 4: 2 DC in first, DC in next 2, repeat around, join, chain 2 (44 DC)
Round 5: 2 DC in first, DC in next 10, repeat around, join, chain 2 (48 DC)
Round 6: 2 DC in first, DC in next 11, join, chain 2 (52 DC)
Round 7: 2 DC in first, DC in next 12, join, chain 2 (56 DC)
Round 8: 2 DC in first, DC in next 13, join, chain 2 (60 DC)
Round 9: 2 DC in first, DC in next 14, join, chain 2 (64 DC)
Round 10-15: DC in each around, join, chain 2 (64 DC)
Round 16: SC in each around, join, finish off, weave in ends (64 SC)

 
Teen/Adult Magic ring, 11 DC in magic ring, join to first DC, chain 2
Round 2: 2 DC in each around, join, chain 2 (22 DC)
Round 3: 2 DC in first, DC in next, repeat around, join, chain 2 (33 DC)
Round 4: 2 DC in first, DC in next 2, repeat around, join, chain 2 (44 DC)

Round 5: 2 DC in first, DC in next 10, repeat around, join, chain 2 (48 DC)
Round 6: 2 DC in first, DC in next 11, join, chain 2 (52 DC)
Round 7: 2 DC in first, DC in next 12, join, chain 2 (56 DC)
Round 8: 2 DC in first, DC in next 13, join, chain 2 (60 DC)
Round 9: 2 DC in first, DC in next 14, join, chain 2 (64 DC)
Round 10: 2 DC in first, DC in next 15, join, chain 2 (68 DC)
Round 11-16: DC in each around, join, chain 2 (68 DC)
Round 17: SC in each around, join, finish off, weave in ends (68 SC)
Earflap 1: 
Chain 1, SC in next 10, chain 1, turn
Row 2: SC decrease, SC in next 6, SC decrease, chain 1, turn
Row 3: SC across (8 SC)
Row 4: SC decrease, SC in next 4, SC decrease, chain 1, turn
Row 5: SC across ( 6 SC)
Row 6: SC decrease, SC in next 2, SC decrease, chain 1, turn
Row 7: SC across (4 SC)
Row 8: Make 2 SC decreases, chain 1, turn
Row 9: SC decrease, fasten off, weave in ends
Earflap 2:
*Join yarn to the other side of hat
Chain 1, SC in next 10, chain 1, turn
Row 2: SC decrease, SC in next 6, SC decrease, chain 1, turn
Row 3: SC across (8 SC)
Row 4: SC decrease, SC in next 4, SC decrease, chain 1, turn
Row 5: SC across ( 6 SC)
Row 6: SC decrease, SC in next 2, SC decrease, chain 1, turn
Row 7: SC across (4 SC)
Row 8: Make 2 SC decreases, chain 1, turn
Row 9: SC decrease, fasten off, weave in ends
Character Embellishments:
 
Eyes:
*make 2
In white, begin with a magic ring, chain 2
Round 1: 8 DC inside ring, sl st to join, chain 2 (8 DC)
Round 2: 2 DC in each around, join, chain 2 (16 DC)
Round 3: 2 DC in first, DC in next, repeat around, join, chain 2 (24 DC)
Round 4: 2 DC in first, DC in next 2, repeat around, join, chain 2 (32 DC)
Round 5: Dc in each around, join, finish off (32 DC)
Iris:
*make 2
In raspberry, begin with a magic ring, chain 2
Round 1: 8 DC inside ring, sl st to join, chain 2 (8 DC)
Round 2: 2 DC in each around, join, finish off (16 DC)
Pupil:
*make 2
In black, begin with a magic ring, chain 2
Round 1: 8 DC inside ring, sl st to join, finish off (8 DC)
*Sew Iris onto Eye and Pupil onto Iris. Sew a white french knot onto the pupil using scrap yarn and a tapestry needle
Smile:
In black, surface stitch arch 2 rows from the brim of your hat, finish off, weave in ends
Dorsal Fin:
In sapphire, chain 12
Row 1: Sl St in second chain from hook, Sl St in next, SC in next 3, HDC in next 3, Dc in next 2 (10)
-Color change to black
Row 2: Chain 1, SC in first 9 sts, Sl St in last, finish off (10)
*Sew onto top center of hat, over Round 1 of above hat pattern
Fins:
*make 2
In sapphire, begin with a magic ring, chain 2
Round 1: 9 DC inside ring, Sl St to join, chain 2 (9 DC)
Round 2: 2 DC in first, DC in next 2, repeat around, join, chain 2 (12 DC)
Round 3: 2 DC in first, DC in next 3, repeat around, join, chain 2 (15 DC)
-Color change to mustard
Round 4: DC in each around, join (15 DC)
Smoosh fin flat, work through both sides to flatten the fin
Round 5: Sl St in first, Sl St in next, HDC in next 2, DC in next, 3 DC in last, finish off, weave ends
*Sew onto sides of hat, over earflaps
Tail Fin:
In black, chain 10
Row 1: DC in second and across (8 DC)
-Color change to mustard
Row 2: Chain 2, 2 DC in first, DC in next 8, 2 DC in last, chain 2, turn (10 DC)
Row 3: 2 DC in first, DC in next 10, 2 DC in last, chain 2, turn (12 DC)
Row 4: 2 SC in first, SC in next 12, 2 SC in last, finish off (14 DC)
*Sew onto back center of hat
Braided Tails:
-Cut 2 each black, sapphire, mustard, and white pieces of yarn about 3 meters long
-Thread them through bottom of the earflap and braid strands
-Tie a knot at the bottom and trim loose tails to 3 inches
*Repeat on other side
Don’t be like Dory & forget to PIN this pattern to your Pinterest boards!


I hope you all enjoyed this pattern, swim on over here to my blog anytime!

blank

get my free crochet pattern series

+ my weekly newsletter straight to your inbox!

Filed Under: kids, kids accessories

Comments

  1. blankJerri says

    November 5, 2016 at 11:07 pm

    Thank you so much for sharing. I can’t wait to make this Dory hat.

  2. blankAnnah says

    November 7, 2016 at 5:51 pm

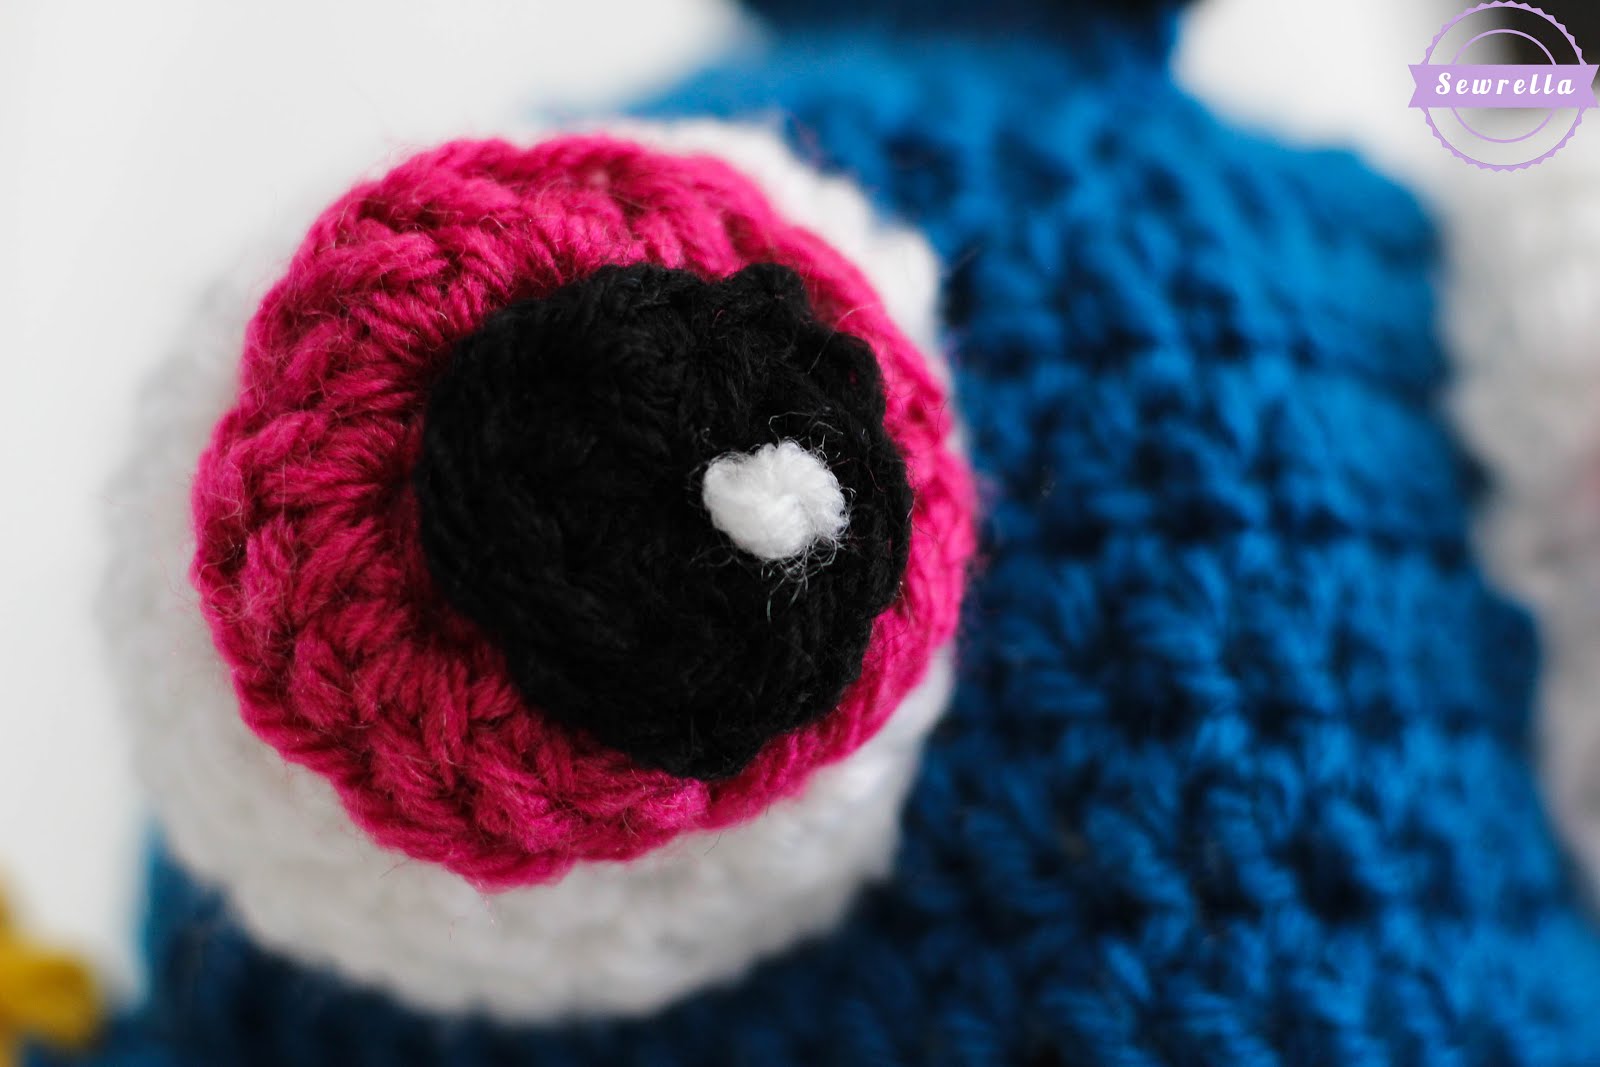
    Thank you so much for posting this. I have finished the pieces as a present for my great niece but I got a little confused on putting it together. Did you stuff the eyes with polyfil or is that just how they stand once attached? I don’t see many instructions on attaching everything, are there more details in the pdf pattern?

    • blankAshleighK says

      November 8, 2016 at 1:04 am

      You can certainly stuff the eyes if you like, but I didn’t stuff my sample so that my hat would hold up to washing better. Up to you! And the PDF version is exactly like what you see here, just formatted a little differently. As far as attaching, I really leave it up to you because with each hat size the placement will be a little different. Just go with what looks good to you, trust your creative intuition! 🙂

  3. blankDarlene Welton says

    November 15, 2016 at 1:31 am

    Thank you for posting this. Making it for my granddaughter and am a little confused on the ear flaps. It says chain one and then SC in next 10 stitches? Where are these 10 stitches?

    • blankAshleigh says

      November 15, 2016 at 5:47 pm

      On the last row of the hat base!

      • blankDarlene Welton says

        November 16, 2016 at 1:05 am

        Okay thank you

  4. blankAndrea says

    November 20, 2016 at 5:34 pm

    I’m having a huge problem keeping my seam straight. Do you count the ch 2 as the first stitch in the round?

    • blankAshleigh says

      November 20, 2016 at 6:04 pm

      Nope you don’t count the Ch 2 as a Dc. Make sure you are stitching in the first st (same as Ch 2) and not stitching in the last sl st from the row below. This can make your seam come out slanted.

      • blankAndrea says

        November 20, 2016 at 7:33 pm

        Thank you so much!!!

  5. blankElizabeth Hill says

    November 30, 2016 at 10:14 pm

    So looking forward to making this for Christmas presents for daughter and grand children. How many skeins of sapphire yarn did you use for the adult hat? For the child’s hat? I am having to order the yarn on line and want to make sure I don’t run short. Thanks again for sharing the pattern.

    • blankAshleigh says

      December 1, 2016 at 3:51 am

      You should only need one skein for each hat, no matter the size! If you are doing newborn or the baby sizes you may get two hats from one skein. Hope this helps!

      • blankElizabeth Hill says

        December 1, 2016 at 4:47 am

        Thank you so much it does help. Off to the shopping page!

  6. blankDebbie says

    December 12, 2016 at 6:40 am

    On the dorsal fin, row 1, I have an unused chain at the end of row 1. I’m not sure what I am doing wrong. Could you please get back to me? Thanks,
    Debbie

blank

Welcome, I'm Ashleigh!

I design crochet and knitting patterns when I'm not indulging in chocolate chip cookies & Gilmore Girls.

Grab a cup of coffee & let's make something together!
About AshleighContactPrivacy
Copyright ©2021, Sewrella. All Rights Reserved.
Design by Pixel Me Designs