Hi guys! I’m so excited to introduce you to some of the cutest crochet Kawaii cuddlers I’ve ever seen from 3amgracedesigns! I hope you love this pattern and make them for your Christmas decor & kids toys.

Hi! We’re Donna & Michaelene! We design Kawaii Cuddlers and Corner-to- Corner (C2C) projects for our website 3amgracedesigns. Donna launched 3amgracedesigns in January of this year and Michaelene joined mid-year offering her attention to detail for the Big Bang Theory project. Together we love dreaming up yarntastic goodness to share with our fellow crochet enthusiasts!

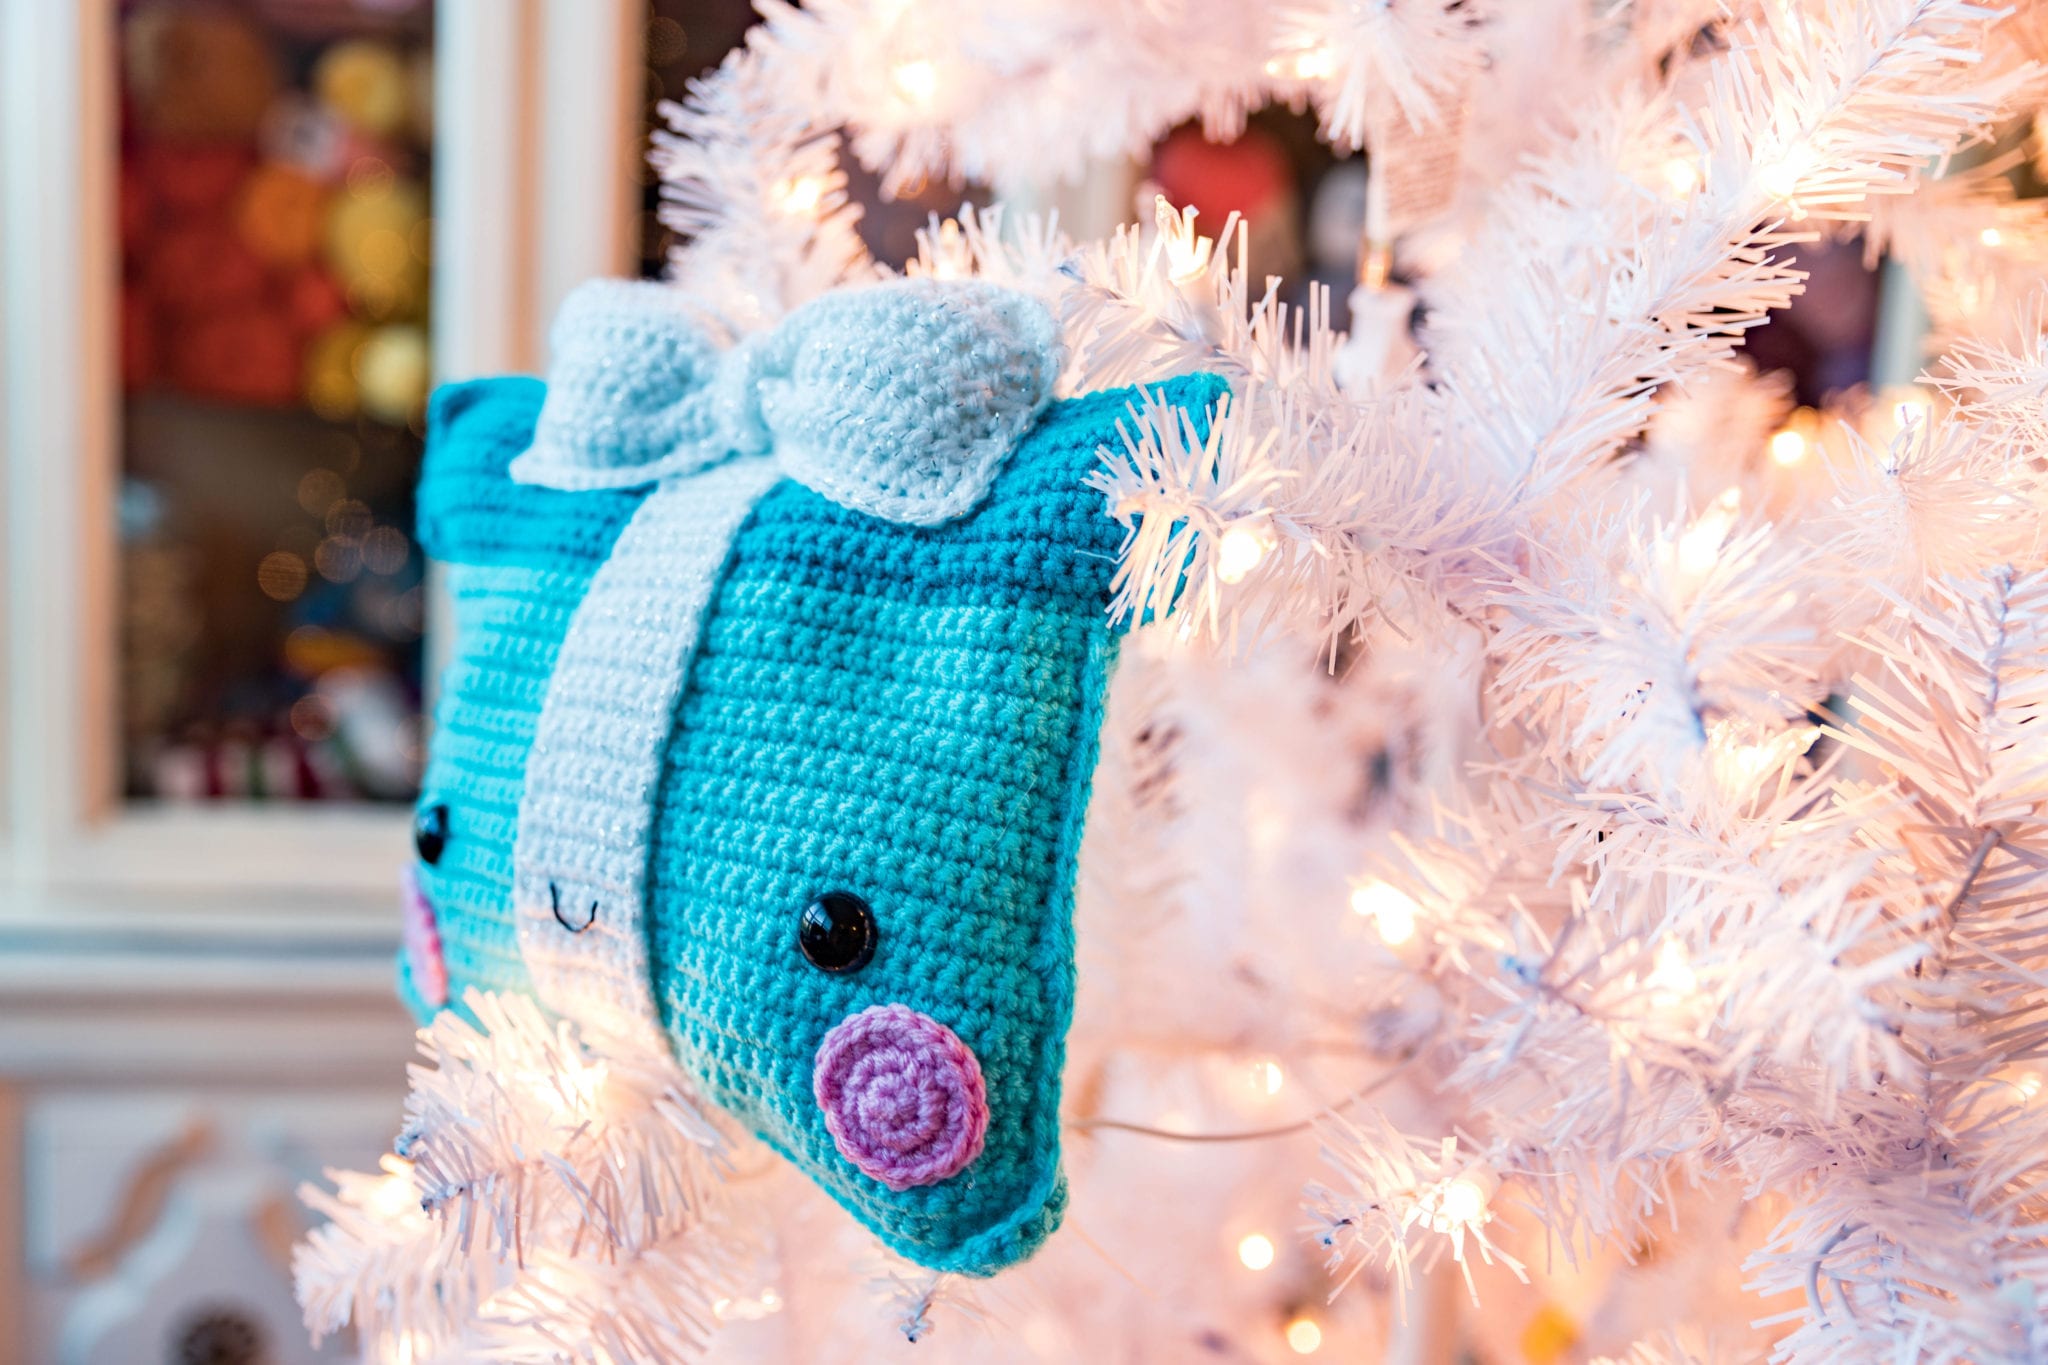
Our Present Kawaii Cuddler is our second Christmas themed Kawaii Cuddler. We love the cuteness of kawaii faces on ordinary objects. The Present is an adorable addition to our Christmas series.
We used Hobby Lobby “I Love This Yarn” for this project. We loved the magical look of the Metallic White yarn but any worsted weight yarn will produce an adorable result!

PATTERN
Materials:
-Size H (5.0mm) Crochet Hook
-Worsted Weight Yarn in Peacock, Turquoise, & Metallic White
-Small scraps of pink yarn for cheeks
-Pair of 18mm Black Safety Eyes
-Poly-fil Stuffing
-Tapestry Needle
-Craft glue or hot glue gun (optional)
-Black puff paint or embroidery floss (optional)
Dimensions/Gauge:
9.5” x 10”
Abbreviations:
Ch – Chain
SC – Single Crochet
HDC – Half Double Crochet
Dec – Single Crochet Decrease
Inc – Single Crochet Increase
FO – Fasten Off
MR – Magic Ring
Sl St – Slip Stitch
Notes:
Unless otherwise specified, you will Ch1 and turn at the end of each row throughout
the pattern.
Present Body
Make 2.
Row 1 – With Turquoise yarn, ch45, SC into 2nd Ch from hook and in each Ch across (44)
Rows 2-4 – SC across (44)
Row 5 – Dec, SC40, Dec (42)
Rows 6-15 – SC across (42)
Row 16 – Dec, SC38, Dec (40)
Rows 17-31 – SC across (40)
FO, Weave in ends.
Present Lid
Row 32 – With Peacock yarn, Ch3, SC across row 31, Ch4 (40)
Row 33 – SC in 2nd Ch from hook, across (46)
Rows 34-41 – SC across (46)
FO, Weave in ends.
Front Ribbon
Row 1 – With White Metallic yarn, Ch8. SC in 2nd Ch from hook and in each Ch across (7)
Rows 2-37 – SC across (7)
FO, Weave in ends.
Bow
Make 2.
Row 1 – With White Metallic yarn, Ch28. HDC in 3rd Ch from hook and in each Ch across ,
Ch2 turn(26)
Rows 2-7 – HDC across, Ch2 turn (26)
FO, Weave in ends.
Place two bows back to back and SC around, placing 3SC in each corner. Stuff prior to
closing.
Bow Center
Row 1 – With White Metallic yarn, Ch12. HDC in 3rd Ch from hook and in each Ch across
(10)
FO, Weave in ends.
Cheeks
Make 2.
Round 1 – MR, 6SC (6)
Round 2 – Inc x 6 (12)
Round 3 – (SC, Inc) x6 (18)
FO, weave in ends
Alternative to Safety Eyes
{Eyes are worked in a continuous round, do not join}
Make 2.
Round 1 – MR, 6SC (6)
Round 2 – Inc x 6 (12)
FO, weave in ends
You can also embroider or use puff paint to create
sleepy eyes like this:
Assembly
-Place safety eyes between rows 15 & 16 from the bottom of Present roughly 24 stitches
apart.
-Sew or glue Front Ribbon down center of Present body.
-Sew or glue cheeks in place.
-With black puff paint or embroidery floss, create desired mouth.
-Align Present halves so ends of rows match. With wrong sides facing each other, single crochet around both pieces to join together. If you want your edging to match – make sure you change colors as you SC around. Stuff with Poly-Fil prior to completing stitching. Make sure you work in an anti-clockwise direction so your stitches face forward.
-Sew or glue Bow Center around Bow pieces and attach to Present.
We would love to see your work! Please use the hashtag #3amgracedesigns on Instagram or share on our Facebook page, email, etc.
Happy Crocheting!